It’s birthday time!

Finished

I like birthdays.  And holidays.  And special occasions.


I like to make things for them.  There’s a good possibility I will make myself a birthday cake this year.  Because I want to.  Because that’s how I roll.  I like to try to make the most challenging thing I can, but still have it be appealing to the people I am cooking for.  I like complex things.  I like to try something that there is a 90% chance I will fail at making and have to start over.


It’s how I learn.  I’ve yet to screw something up twice.  And I don’t get discouraged.  Just do the dishes and start over, this time with more knowledge and a better game plan.


That’s how I like to cook and bake.  Someday I am going to make every single recipe in Thomas Keller’s cookbook from The French Laundry.  I’ve yet to receive this as a gift so I haven’t begun on this task yet (hint, hint).  To date I’ve tackled two recipes.


The thing I love about this cookbook is that while a number of the recipes are quite complex, when you boil them down, really read them first, they’re not all that difficult.  They are challenging, but in a good way. 

Unfrosted

 Back to birthdays.


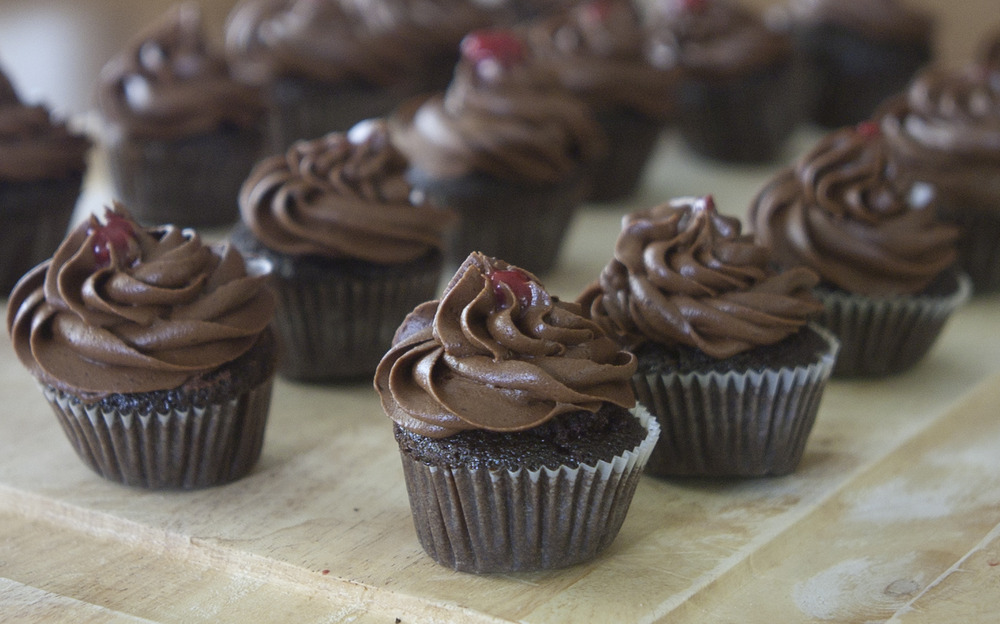
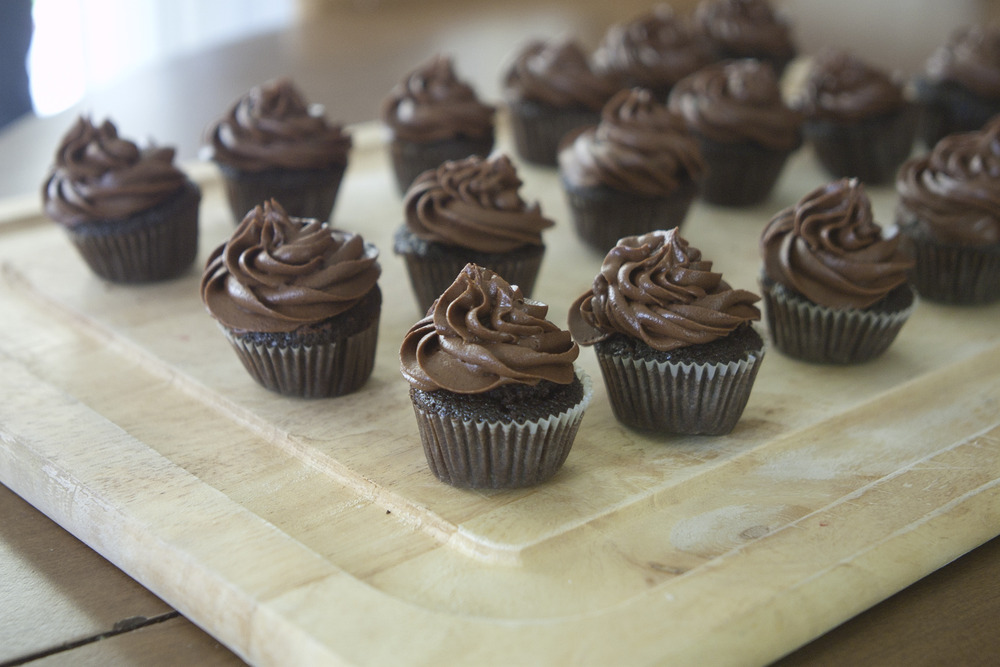
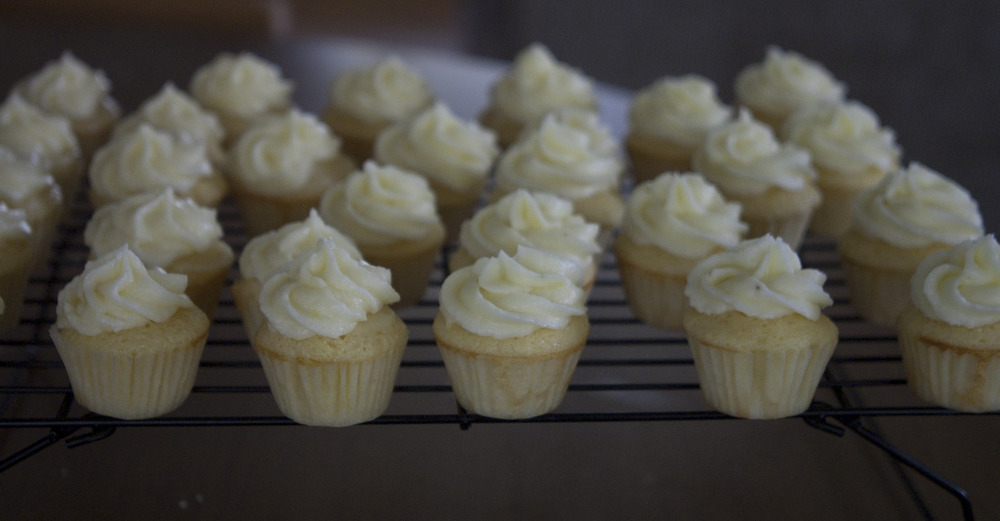
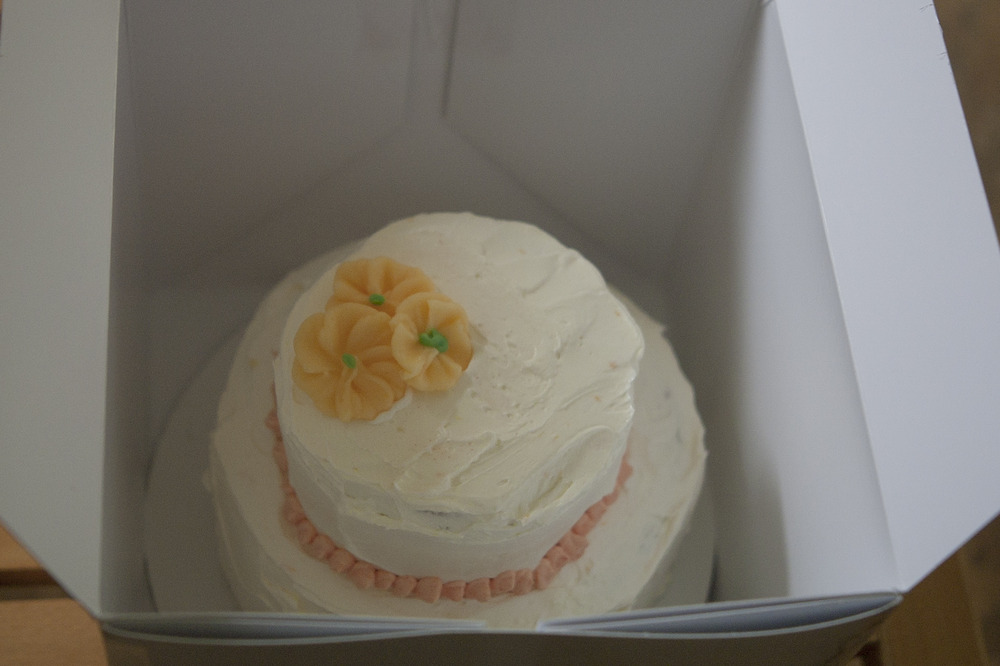
It was my mother’s birthday a few weekends ago, and as I said before, I made her a cake.  It was cute, and small, and white.  With lots of buttercream. 

Oranges

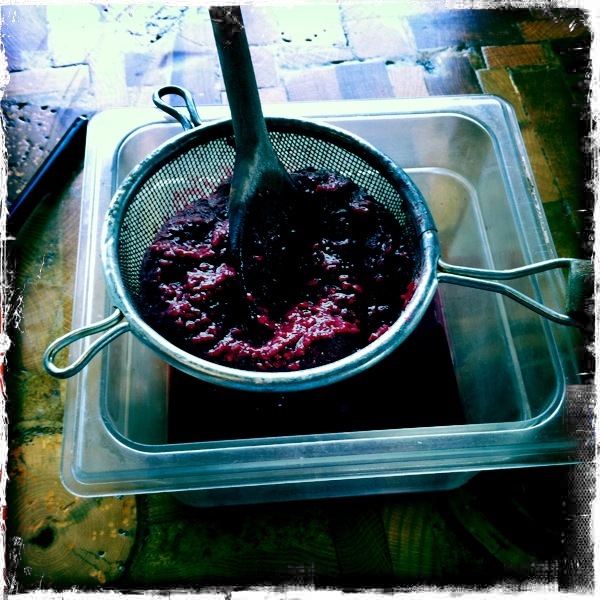
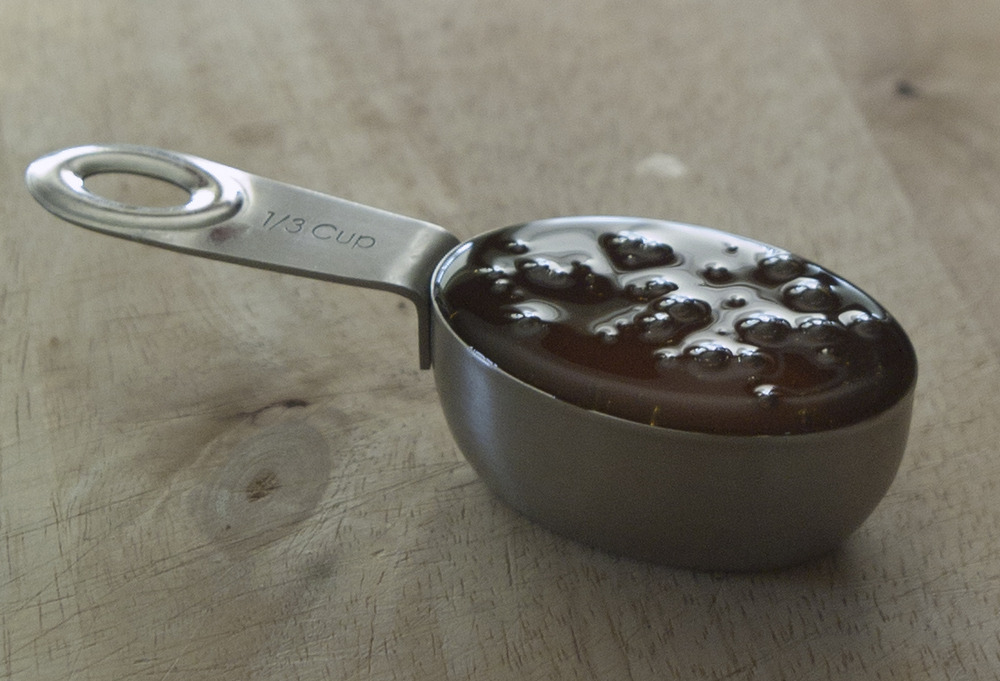
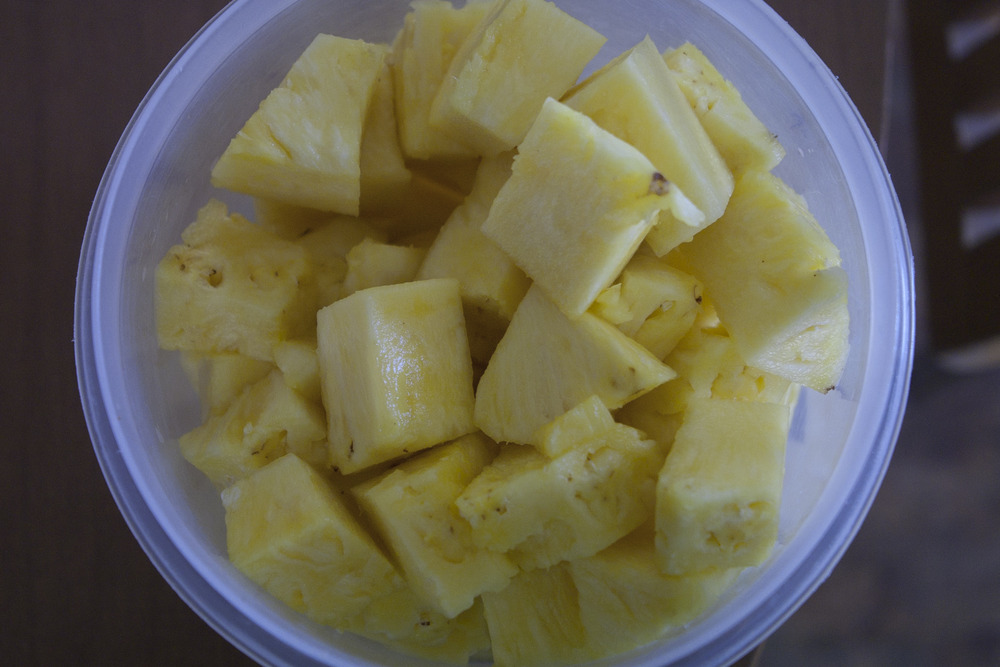
 There were also oranges and zest and cream.


This cake was intense.  And intended as such.   Okay, possibly a bit too intense considering the time it took to bake completely.  But it was good.

Boxed


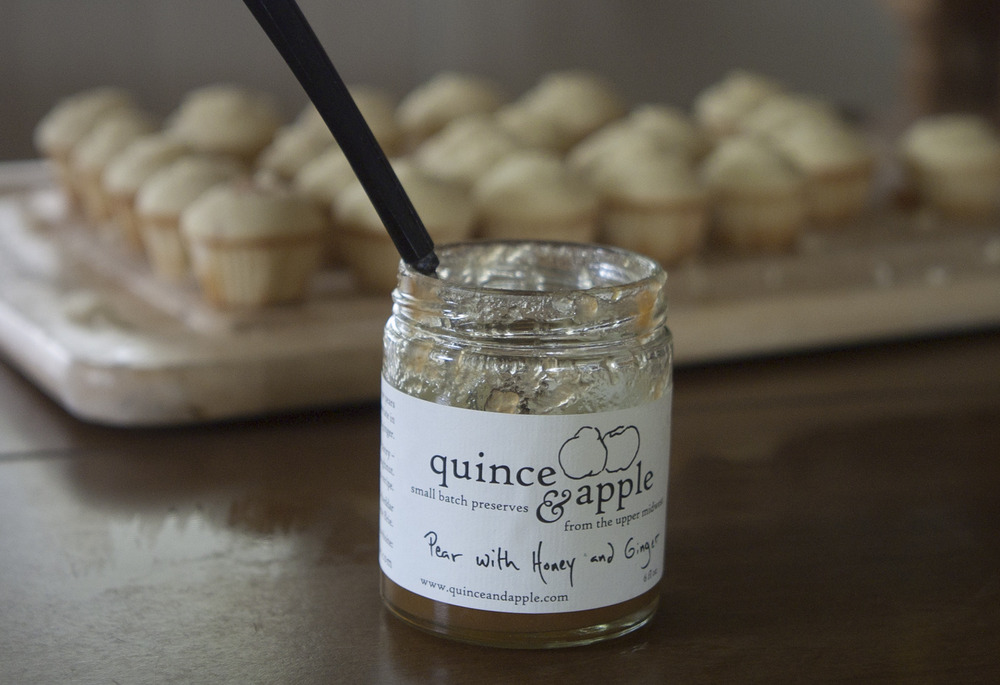
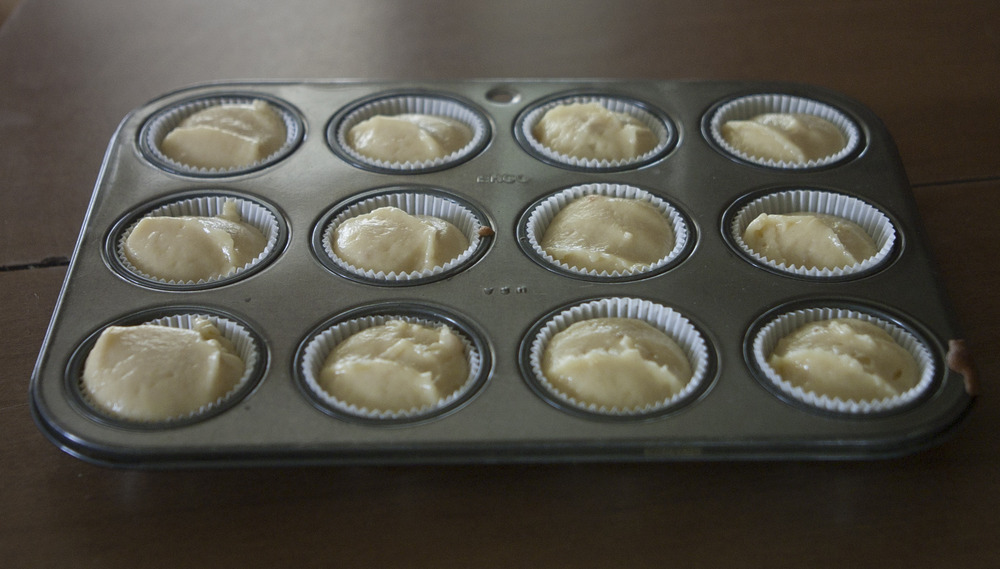
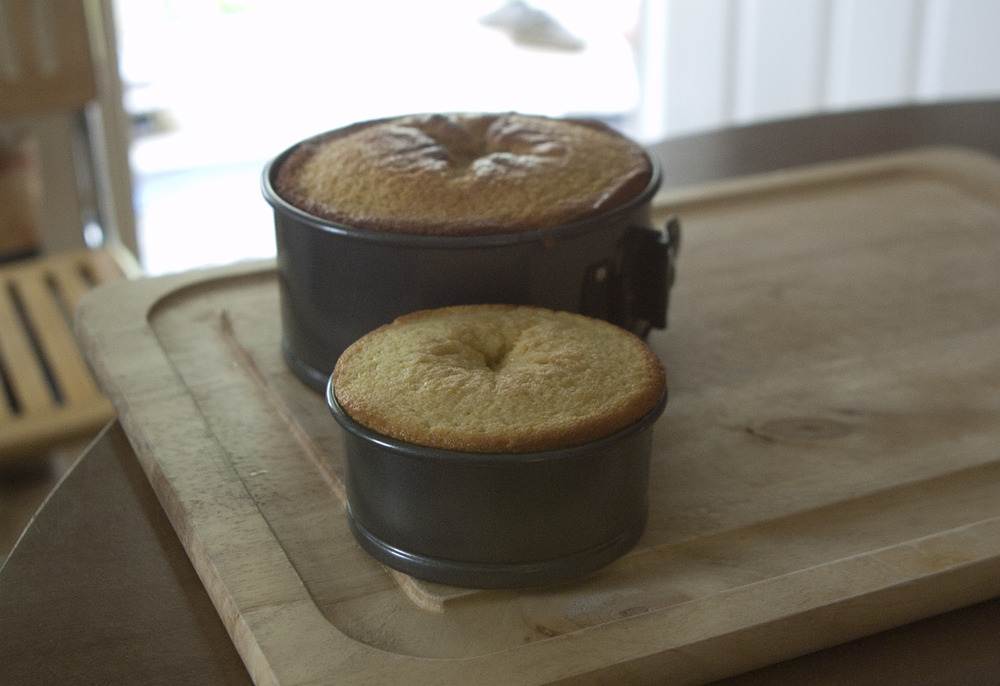
I used this recipe, which I will be using for a function later in the summer, and made a few changes.   I will probably use it in its pure form this summer; as I will be doing cupcakes and I think lighter is better.  Since I used cream in this cake instead of milk it was quite dense, and took longer to bake.  I took it out a little early, hence the slightly sunken look in the unfrosted photo.  Don’t worry if that happens, as long as the center is done.  You probably need to cut off the top anyway to get it flat.


Next time I’ll get 4 cake pans.  I used springform pans this time since it was what I had.  It worked fine, but would turn out better in thinner pans.


In June I’ll get another chance to try since my husband will be having a birthday.  


Saturday work

Img_0982

I spent my saturday helping out our friends at Milkweed.

Img_0979

I made some ice cream.

We moved some rocks.

We put some dead trees in the ground and strung up some lights.

It was a good time.

It was a lot of work.

We ate grilled cheese with asparagus and goat cheese for lunch.  

We drank espresso and beer.

I took some pictures.

I made some stuff.

It was a good day.

Img_0981
Img_0980

There was raspberry sauce involving tequila.

Img_0984
Img_0983
Img_0985

There was rhubarb stewed in simple syrup, which will later be dehydrated.

Img_0989
Img_0988
Img_0990


It was a pretty great Saturday afternoon.

Searching for flour

Unbaked_pie

I’ve been playing around with flour lately.  I really want to use a locally made organic brand.  I found some at the farmers market the other day and decided to test it out.


I bought wheat bread flour and wheat pastry flour.  The first thing I tried it with was a cookie.

Chocolate_chip_cookie_dough

I didn’t even take a photo of the finished product, they were too runny, and although tasty, not what I was looking for.


Next I made piecrust.

Dough

  That came out perfectly. 

Pie_crust

 I made this delicious berry pie.

Unbaked_topping

It was really good, and warm with a scoop of vanilla ice cream is something I dream about.

Baked_pie

Next I tried turnovers.  I filled them with blueberries and cream cheese. 

Cream_cheese

 They were good, however I think the recipe I used for the crust could have used more sugar.  

Raw

The dough somehow tasted savory.  

Turnover

So I glazed them with lemon sugar glaze.

Finally I made bread. 

1st_rise

 It was good, but it wasn’t perfect.  

2nd_rise

It didn’t rise as much as I wanted and seemed too dense.

2_risen

Finished_bread

So, I decided this flour wasn’t what I wanted to use.  Sadly as I liked that it came from nearby and that I knew where the wheat was grown.  It’s probably for the best however, considering a small two-pound bag cost $5. 


I am still on the quest for the perfect flour.  When I find it, I’ll let you know.  I like the idea of knowing where all of my food came from, even the smallest of ingredients.

Cakes, cakes and more cakes!

Frosted_whole

Ok so here’s the deal.


I’m not perfect.  Yes, I make a lot of delicious stuff, but pastry chef I am not.


This stuff is all still kind of new to me.  I’m pretty much learning it all as I go.  And sometimes I make mistakes, or things don’t come out quite perfect.


So, I’m not going to edit, or censor.


Every single baked good I make, and even some of the savory things will end up on here.  Hopefully, it will help me get better.


Right now I’m working on tiered layer cakes.


They’re really not that difficult, but to a perfectionist also not that simple.  I want my cakes to come out looking like something from a Martha Stewart magazine.  Probably a bit of a stretch considering I’ve made a total of two so far.  For the first two, I think they’re pretty good.


The first cake was practice for the second.  I wanted to give my mother a beautiful little layer cake for her birthday.  I had cocoa powder so I thought a chocolate cake would be nice.  And considering my slightly insane love of raspberries I thought I would fill the layers with raspberry purée.  It was pretty amazing.


The cake was moist and intensely chocolate.  The raspberry complimented it perfectly.  The frosting was just ok.  I used the basic frosting recipe from Hershey’s (even though I wasn’t using their cocoa powder).  I remember loving this frosting as a kid.  Now it seems far too sweet and slightly grainy.  I also made mini cupcakes with the left over batter.

Completed

They were filled with raspberry and quite cute.

Fillled2


Frosted

The second cake I made for my mother was an orange buttercream cake.  It was damn good.  And very rich.  It turned out looking much better then the chocolate cake.  Buying a cake-frosting spatula helped immensely.  I will post that recipe soon.


 I have a goal to make a wedding cake for someone.  So I will continue working on my cakes, and eventually I will make a gorgeous, huge, tiered layer cake that looks good enough for Martha.


Good tools are key for these types of cakes.  So is buttering and flouring the pan.  They’re not that hard and look quite impressive, I would definitely recommend trying them to impress someone for their next birthday.


Chocolate Raspberry Layer Cake


            Ingredients

1 cup coffee

3/4 cup cocoa powder

1/2 whole milk

2 cups flour

1 1/4 teaspoon baking soda

2 sticks of butter softened

1 1/4 cup brown sugar

3/4-cup sugar

4 eggs

Directions 


1.  Preheat oven to 350 degrees.  Butter and flour 2 pans, you can use a variety of shapes, sizes and types.  You want to make enough cake to have layers and tiers as well.  I used an 8-inch spring form and a 4-inch.  I then had to slice each finished cake in half. 

2.  Brew 1 cup of strong coffee.  Mix cocoa powder in with coffee until dissolved.  Once cooled add milk.

3.  In another bowl mix flour, and baking soda.

4.  In a mixer using the paddle attachment cream butter and sugars together.  Add eggs one at a time until well blended.  Add flour mixture and coffee mixture alternating, starting and ending with flour.

5.  Pour into cake pans, filling 3/4 full.  Place pans on cookie sheet and bake until a toothpick inserted in the center comes out clean.  Times will vary based on cake pan size.  The timing I use goes a little like this:  14 minutes for mini cupcakes, 18 minutes for regular size cupcakes, 20 minutes for smaller cake pans and 40 minutes for larger cake pans.  Just watch them, and keep a toothpick handy.  It’s not that hard.  I promise

6.  Once cooled place cakes in the freezer for about 20 minutes.  This makes them much easier to slice.  Slice cakes in half, as well and leveling the top.  Leveling isn’t necessary but helps.  Start with the bottom tier first, fill with raspberry filling.  All I did was cook a bag of frozen raspberries for 20 minutes with 4 tablespoons of sugar.  Put top on first tier and return to freezer for another 20 minutes.  Repeat this process with the second tier.

Cake_layers

7.  Frost the layers.  Start with the bottom layer, putting a large amount of frosting on the top and working your way to the edges.  Allow the frosting to fall over the edges and smooth along the sides.  Put the second tier on top and repeat the process.  Using a frosting spatula will allow for much smoother frosting.

1st_layer_frosted

Here’s the recipe I used for the frosting.


Salad Shooter!

Finished_salad

Remember Salad Shooter?


I definitely do.  I have a distinct memory of the scene from Benny & Joon where the men are playing poker, and Oliver Platt throws a salad shooter in the pot.  He sings the little jingle and everything.  Pretty much since seeing that movie as a kid every single time in my life I have uttered the words “salad shooter” I have sang them in the same fashion.  That movie rocks.


This really doesn’t have all the much to do with salad shooters; it’s really just a salad.  


Salad?  Yes, yes I do make savory things.  Every once and a while.  Or maybe every day.  I like to cook.  More then most normal 40 hour a workweek people.  A lot more then I like to do dishes.  I’ve yet to convince my husband that the dishes are his job every time I cook.  I’m still working on it though.


Back to salads.  


When spinach and lettuce are in season (locally that is) I attempt to eat a salad every day.  I won’t lie and say that I accomplish this goal, but never the less, I try.  I really like salads.  And runny poached eggs.  I could eat a salad with the right toppings as a meal every day.


This one is more of a side dish, but could easily be made into a meal.  I was inspired by a recent recipe from Martha Stewart.  Take this as more of a suggestion, then a recipe.  Get inspired to eat salad and put your own twist on it.  It’s easy.  

Potatoes_shallots


I chopped up some potatoes with shallots.  I crisped up some bacon.


Cooked_potatoes_shallots


I poached an egg.  I topped the spinach with the hot potatoes, shallots, and bacon. I drizzled it with olive oil and balsamic.


It was so good.


Runny egg yolk on a salad is like heaven.  Try it, even if you’re scared of runny eggs.  Try it.

Broken_yolk


Yum.

Cupcakes for my Momma

This is my mom.

Mom_by_pond


She was a total hippie.  And pretty gorgeous too, right?


She’s pretty much the most amazing woman ever.  Seriously. You wish she was your mother.  I can’t imagine having a better mother.  She’s a writer, so she was always around when we were growing up.  I have these warm fuzzy memories of doing crafts at the kitchen table.  They all seem to blend into one mishmash of light and colors and sound.  And a feeling.  That wonderfully blissful feeling that comes from being young and loved and protected.  I am really lucky to have grown up with such an amazing mother.


This mothers day I decided to make her cupcakes.  And brunch.  My mom likes frosting.  Really good frosting.  She would probably just settle for a jar of it and a spoon.

Qa_cupcake


I was trying to think of something light and springy that would be perfect for mother’s day.  I tossed around a number of ideas and finally settled on Pear Honey Ginger cupcakes using preserves from Quince and Apple.  They make local preserves here in Madison and they are so good.  Totally worth the price and pretty amazing.

Quince_and_apple


I swirled the jam in the batter, in the frosting and put a nice jammy center in the middle of the cupcake.  

Batter


The flowers on the top are practice for my parent’s upcoming anniversary party, for which I am baking a ton of cupcakes this summer.  They’re pretty cute aren’t they?  

Flowers


They took quite a lot of practice, but after about 70 I got the hang of it.


So these are my cupcakes for my mom.  They don’t in any way begin to express how great my mom is.  But, they’re delicious and she requested baked goods, so hopefully they are a small token of my gratitude for being raised by such a wonderful woman.


Pear Honey Ginger Cupcakes

Makes 24 regular or 84 mini cupcakes


           Ingredients

2 1/2 cups all purpose flour          

2 cups cake flour

2 1/4 teaspoons baking powder

1 1/4 teaspoon salt

1 cup whole milk

1 tablespoon vanilla extract

1/3 cup Quince and Apple Pear Honey Ginger preserves

2 sticks plus 1 tablespoon unsalted butter, softened

2 1/4 cups sugar

6 eggs

Unfrosted_pear


           Directions


1.     Preheat oven to 350 degrees.  Line 12-cup muffin tins with baking cups.

2.     Whisk together flours, baking powder and salt in a small bowl.  Stir milk and vanilla in another small bowl.   Beat butter in mixer on medium speed until light and fluffy, approximately 3 minutes.  Add sugar slowly while mixing.  Beat until pale and fluffy, about 3 minutes.  Beat in eggs 1 at a time, mixing after each addition.  Scrape bowl and beat until smooth.

3.     Reduce speed and slowly add 1/3 of flour mixture.  Alternate adding milk mixture and flour mixture until all ingredients added.   

4.     Divide batter among muffin tins.  Using a small cookie scoop is the easiest way to do this, filling each cup with two large scoops (one scoop if doing mini cupcakes).  Bake until a toothpick comes out clean, about 20-25 minutes (about 14 minutes for mini cupcakes).  Cool completely.  Fill center with jam using a piping bag.  Cutting a small cone out of the center of the cupcake is the easiest way to insure there is enough jam.  Frost with cream cheese frosting once jam center has set for a few minutes.  Decorate tops with buttercream flowers.


 Cream Cheese Frosting

Frosted


Ingredients

8 ounces cream cheese

1 stick unsalted butter, softened

2 cups confectioners’ sugar

2 tablespoons Quince and Apple Pear Honey Ginger preserves

1 tablespoon vanilla extract


            Directions

1.  Beat cream cheese in a mixer on medium speed with paddle attachment until smooth.  Add butter and beat until light and fluffy.  Add preserves.

2.  Reduce speed to low.  Add vanilla.  Slowly add sugar.  Beat until Smooth.  If frosting seems thin add up to 1/2 cup more confectioners sugar.

Cinnamon Roll Goodness

Rolls

Remember Cinnabon? 


Maybe you still have one in your local mall.  We don’t.  Haven’t for a while.  I can’t remember the last time I had a cinnamon roll from a Cinnabon.  I’m pretty sure they are the standard that everyone making cinnamon rolls strives for.  They’re huge, and gooey and loaded with frosting.  They’re so good.  Probably full of fat and preservatives and all sorts of other disgusting things.  But they’re still amazingly good.


I’ve always just bought cinnamon rolls in a tube at the store.  Until my recent awakening about food.  Have you read the label on one of those things?  Pretty scary.  I mean think about it, how long does one of those tubes last?  Seriously that’s just not natural.

Dough


I’ve bought cinnamon rolls from this great baker at the farmers market recently and they’re pretty good.  But there’s been something missing.


I hunted around for a recipe for quite some time.  And of course, landed on one from joy the bakers blog again.  Yes I know, I’m kind of obsessed with her.  How could you not be?  She’s a damn good cook, and takes beautiful photos of her amazing food.

Dough2


These cinnamon rolls are loaded with sugary cinnamony goo.  They’re light and fluffy, and there is something magical about the cream cheese that is rolled into the dough.  These rolls rise twice and puff even more in the oven. 


They may seem intimidating upon first reading the recipe, and don’t misunderstand me, they aren’t the easiest recipe ever.  But with a little patience and a little bit of preplanning they are simple.  They are time consuming.   I suggest getting them ready the night before.  Then you can just do the last rise in the morning and bake them.  Because who are we kidding, cinnamon rolls must be eaten for breakfast.

Dough3


Here’s the recipe.  I decided not to copy the whole recipe over when Joy did such a great job with it in the first place.  I left out the nuts and raisins, in my opinion they have no place in a cinnamon roll.  You can do whatever you want with the filling, just do it, try and new recipe and surprise yourself with you baking skills.

Chocolate Banana Bread

Bnana1

There was a time when I didn’t like banana bread.  Or at least I thought I didn’t.  Maybe it was due to the fact that many varieties have nuts in them.  Which I am not a fan of.  A few summers ago, my husband and I stayed with my parents for a couple of months.  At some point we had a bunch of bananas, which were about to expire, so I decided to try my hand at banana bread.  My husband has long loved banana bread.  His mother often makes loaves of it and sends them home with us.  I too, have been converted.


My favorite adaptation of banana bread involves really, really good chocolate, chopped.  It also involves a pinch of cinnamon and nutmeg.  And lots of banana.  Brown, mushy loaded with sugar, bananas. 


Bnana4

I do not put nuts into my banana bread.  You can if you like.  I think it ruins a beautifully fluffy loaf of bread.  Why would you want those crunchy chunks in there?  I was out of chocolate when I made this bread, alas it was sad, but still delicious.


This bread is almost magical fresh out of the oven.  The outside gets brown and crusty, while the inside stays soft and moist.  With a glass of milk and a bit of butter it is heavenly.


Bnana2


Chocolate Chunk Banana Bread


            Ingredients


3/4 cup sugar

1 egg

1/2 cup butter, softened

2 mashed bananas

3 tablespoons whole milk

1 teaspoon vanilla

2 cups flour

1 teaspoon baking powder

1/2 teaspoon baking soda

1/4 teaspoon nutmeg

1/4 teaspoon cinnamon

8 ounces semi sweet chocolate chopped


Bnana3


            Directions


1.  Preheat oven to 350 degrees.  In a mixture using the paddle attachment cream butter for about 2 minutes.  Add sugar and beat another 2 minutes.  Add egg, bananas, milk and vanilla.


2.  In another bowl mix flour, baking powder, baking soda, nutmeg and cinnamon.  Slowly add dry mixture to wet until fully incorporated.  Add chocolate and beat until just incorporated.  This will break down the chunks just slightly.  Pour in large loaf pan greased with butter and bake for 1 hour, until top is deep golden brown and a toothpick inserted in the center comes out clean.  Cool for 15 minutes, then remove from loaf pan.


Panna Cotta

Crw_0993

I’m on a milk kick.  Real milk that is.  Straight from the cow. It’s sooooo good.  Say what you will about the bacteria and pasteurization, this stuff is way better then the watered down crap at the store.  It’s totally worth the non-existent risk.  Try it, I dare you.


My husband has been working for a friend at his restaurant/farm for about a year.  This is no regular farm.  He built his house on his families land and now he runs an amazing supper club style eatery out of his home.  You can check it out here.  One of the perks of my husband working there is the amount of food he brings home, including fresh milk from the cows.


So I decided to do something with this milk.  We had already been drinking it constantly, I’ve been cooking and baking with it, but I wanted something that would really show off the milk itself.


Panna Cotta.


If you’re not familiar with it, you need to be.  Now.  It’s amazing. Like melt in your mouth creamy goodness. It’s sooo yummy.  Slightly less thick then crème brulee, and since there are no eggs it takes on a slightly silkier texture.  It is definitely a favorite.  And quite possibly, the easiest, most foolproof dessert ever.


Heat, melt, stir, cool and eat.


It’s really that simple.  The gelatin does the work for you.


Yes, yes, I know.  Gelatin.  Vegetarians beware.  It’s a fabulous product and one of the few of its type I use, but if you’re into desserts the way I am, it is your friend.

Panna_cotta1


The recipe here is not my own.  You can however make simple adjustments in flavor, like say chocolate or orange zest.  I prefer the recipe as is, topped with loads of fresh berries, just the way Giada wrote the recipe.


I love her, by the way.  She is gorgeous; she cooks amazing food, who wouldn’t?  I’m pretty sure men watch her show just to stare at her in low cut tops.  I mean really food network, who cooks in those outfits?  I guess Giada does since she can ruin them with grease and flour and not worry.


Try this recipe, regardless of your raw vs. pasteurized milk preferences.  Either way it is amazing.  It’s a great way to wow people at a dinner party, since it looks so fancy, yet is so easy.

Honey


Panna Cotta with Fresh Berries


Recipe from Giada De Laurentiis


Ingredients

1 cup whole milk

1 tablespoon unflavored powdered gelatin

3 cups whipping cream

1/3 cup honey

1 tablespoon sugar

Pinch salt

2 cups assorted fresh berries


Directions

1.  Place the milk in a small bowl. Sprinkle the gelatin over. Let stand for 3 to 5 minutes to soften the gelatin. Pour milk mixture into a heavy saucepan and stir over medium heat just until the gelatin dissolves but the milk does not boil, about 5 minutes. Add the cream, honey, sugar, and salt. Stir until the sugar dissolves, 5 to 7 minutes. Remove from the heat. Pour into 6 wine glasses so that they are 1/2 full. Cool slightly. Refrigerate until set, at least 6 hours.  You can also pour the mixture into ramekins and invert them onto plates just before serving.

2.  Spoon the berries atop the panna cotta and serve. 


Bunny Cake

Bunnycake

I wrote this lovely missive about Easter, and bunnies and cakes.  It was delightful, and funny.  And then I lost it.  Why would I not type it up the second I got home?  Idiotic.  If it magically reappears, I will replace this post with it’s intended rant.  Until then, I leave you with photos and recipes.


Bunnycake2

Bunny cake pre-frosting.  This cake was adorable.  It was not however, as delicious as it looks.  It’s so wide that I had to cook it much longer then the instructions said just to have a toothpick come out clean.  And then when we cut into the middle there was still raw batter at the center.  I would have had to char the outside to cook the inside.  The frosting was delicious since I made this buttercream.  I omitted the salt and vanilla.  Next time I make a cake shaped like something I plan on simply cooking different sized cakes and sculpting the shape I want.  I went to art school, I can do that, right?


Pineapple

I also used a lot of pineapple on Easter.  In the cupcakes I made with the abundant amounts of batter I had left over from the cake, in the glaze for the ham, and in the vinaigrette for the salad.


Cupcakes2

Pineapple cupcakes without frosting.


Cupcakes

And with frosting.


Bread_dough

Dough for the rolls.


Rolls

After rising before going into the oven.


Rolls3

I really like these rolls.


Rolls2

You can find the recipe for these here.  They call for bread flour, I used all purpose.  It work’s just fine.


Ham

Here’s the ham.  I didn’t take a picture of the whole thing, which is a shame, it was a thing of beauty.  I made a pineapple, brown sugar, rum glaze.  


Pineapple Brown Sugar Glaze


Ingredients


1 pineapple, peeled and cored

1 cup brown sugar

1 cup white sugar

2 tablespoons dark rum


Directions


1.  Mix all ingredients in a medium saucepan and cook over medium heat until sugars have melted.  Turn heat down to medium low and stew for at least 1 hour, longer if desired.  You are trying to get as much juice to cook out of the pineapple as possible.  Add a little water if necessary.

2.  When ham has 1 hour remaining of cook time, brush ham thoroughly with glaze.  Dump some of the stewed pineapples on top of the ham as well.  Baste every 15 minutes with glaze until ham is done and glaze is nicely caramelized.


Potatoes

I also made hasselback potatoes.  That’s a fancy way to say you slice them without cutting all the way through, and wedge garlic in between the slices.  Then you baste them with butter every 15 minutes.  They are really yummy.


Quiche

I made this quiche too.  I added bacon, because everything is better with bacon.