Cinnamon Roll Goodness

Rolls

Remember Cinnabon? 


Maybe you still have one in your local mall.  We don’t.  Haven’t for a while.  I can’t remember the last time I had a cinnamon roll from a Cinnabon.  I’m pretty sure they are the standard that everyone making cinnamon rolls strives for.  They’re huge, and gooey and loaded with frosting.  They’re so good.  Probably full of fat and preservatives and all sorts of other disgusting things.  But they’re still amazingly good.


I’ve always just bought cinnamon rolls in a tube at the store.  Until my recent awakening about food.  Have you read the label on one of those things?  Pretty scary.  I mean think about it, how long does one of those tubes last?  Seriously that’s just not natural.

Dough


I’ve bought cinnamon rolls from this great baker at the farmers market recently and they’re pretty good.  But there’s been something missing.


I hunted around for a recipe for quite some time.  And of course, landed on one from joy the bakers blog again.  Yes I know, I’m kind of obsessed with her.  How could you not be?  She’s a damn good cook, and takes beautiful photos of her amazing food.

Dough2


These cinnamon rolls are loaded with sugary cinnamony goo.  They’re light and fluffy, and there is something magical about the cream cheese that is rolled into the dough.  These rolls rise twice and puff even more in the oven. 


They may seem intimidating upon first reading the recipe, and don’t misunderstand me, they aren’t the easiest recipe ever.  But with a little patience and a little bit of preplanning they are simple.  They are time consuming.   I suggest getting them ready the night before.  Then you can just do the last rise in the morning and bake them.  Because who are we kidding, cinnamon rolls must be eaten for breakfast.

Dough3


Here’s the recipe.  I decided not to copy the whole recipe over when Joy did such a great job with it in the first place.  I left out the nuts and raisins, in my opinion they have no place in a cinnamon roll.  You can do whatever you want with the filling, just do it, try and new recipe and surprise yourself with you baking skills.

Chocolate Banana Bread

Bnana1

There was a time when I didn’t like banana bread.  Or at least I thought I didn’t.  Maybe it was due to the fact that many varieties have nuts in them.  Which I am not a fan of.  A few summers ago, my husband and I stayed with my parents for a couple of months.  At some point we had a bunch of bananas, which were about to expire, so I decided to try my hand at banana bread.  My husband has long loved banana bread.  His mother often makes loaves of it and sends them home with us.  I too, have been converted.


My favorite adaptation of banana bread involves really, really good chocolate, chopped.  It also involves a pinch of cinnamon and nutmeg.  And lots of banana.  Brown, mushy loaded with sugar, bananas. 


Bnana4

I do not put nuts into my banana bread.  You can if you like.  I think it ruins a beautifully fluffy loaf of bread.  Why would you want those crunchy chunks in there?  I was out of chocolate when I made this bread, alas it was sad, but still delicious.


This bread is almost magical fresh out of the oven.  The outside gets brown and crusty, while the inside stays soft and moist.  With a glass of milk and a bit of butter it is heavenly.


Bnana2


Chocolate Chunk Banana Bread


            Ingredients


3/4 cup sugar

1 egg

1/2 cup butter, softened

2 mashed bananas

3 tablespoons whole milk

1 teaspoon vanilla

2 cups flour

1 teaspoon baking powder

1/2 teaspoon baking soda

1/4 teaspoon nutmeg

1/4 teaspoon cinnamon

8 ounces semi sweet chocolate chopped


Bnana3


            Directions


1.  Preheat oven to 350 degrees.  In a mixture using the paddle attachment cream butter for about 2 minutes.  Add sugar and beat another 2 minutes.  Add egg, bananas, milk and vanilla.


2.  In another bowl mix flour, baking powder, baking soda, nutmeg and cinnamon.  Slowly add dry mixture to wet until fully incorporated.  Add chocolate and beat until just incorporated.  This will break down the chunks just slightly.  Pour in large loaf pan greased with butter and bake for 1 hour, until top is deep golden brown and a toothpick inserted in the center comes out clean.  Cool for 15 minutes, then remove from loaf pan.


Panna Cotta

Crw_0993

I’m on a milk kick.  Real milk that is.  Straight from the cow. It’s sooooo good.  Say what you will about the bacteria and pasteurization, this stuff is way better then the watered down crap at the store.  It’s totally worth the non-existent risk.  Try it, I dare you.


My husband has been working for a friend at his restaurant/farm for about a year.  This is no regular farm.  He built his house on his families land and now he runs an amazing supper club style eatery out of his home.  You can check it out here.  One of the perks of my husband working there is the amount of food he brings home, including fresh milk from the cows.


So I decided to do something with this milk.  We had already been drinking it constantly, I’ve been cooking and baking with it, but I wanted something that would really show off the milk itself.


Panna Cotta.


If you’re not familiar with it, you need to be.  Now.  It’s amazing. Like melt in your mouth creamy goodness. It’s sooo yummy.  Slightly less thick then crème brulee, and since there are no eggs it takes on a slightly silkier texture.  It is definitely a favorite.  And quite possibly, the easiest, most foolproof dessert ever.


Heat, melt, stir, cool and eat.


It’s really that simple.  The gelatin does the work for you.


Yes, yes, I know.  Gelatin.  Vegetarians beware.  It’s a fabulous product and one of the few of its type I use, but if you’re into desserts the way I am, it is your friend.

Panna_cotta1


The recipe here is not my own.  You can however make simple adjustments in flavor, like say chocolate or orange zest.  I prefer the recipe as is, topped with loads of fresh berries, just the way Giada wrote the recipe.


I love her, by the way.  She is gorgeous; she cooks amazing food, who wouldn’t?  I’m pretty sure men watch her show just to stare at her in low cut tops.  I mean really food network, who cooks in those outfits?  I guess Giada does since she can ruin them with grease and flour and not worry.


Try this recipe, regardless of your raw vs. pasteurized milk preferences.  Either way it is amazing.  It’s a great way to wow people at a dinner party, since it looks so fancy, yet is so easy.

Honey


Panna Cotta with Fresh Berries


Recipe from Giada De Laurentiis


Ingredients

1 cup whole milk

1 tablespoon unflavored powdered gelatin

3 cups whipping cream

1/3 cup honey

1 tablespoon sugar

Pinch salt

2 cups assorted fresh berries


Directions

1.  Place the milk in a small bowl. Sprinkle the gelatin over. Let stand for 3 to 5 minutes to soften the gelatin. Pour milk mixture into a heavy saucepan and stir over medium heat just until the gelatin dissolves but the milk does not boil, about 5 minutes. Add the cream, honey, sugar, and salt. Stir until the sugar dissolves, 5 to 7 minutes. Remove from the heat. Pour into 6 wine glasses so that they are 1/2 full. Cool slightly. Refrigerate until set, at least 6 hours.  You can also pour the mixture into ramekins and invert them onto plates just before serving.

2.  Spoon the berries atop the panna cotta and serve. 


Bunny Cake

Bunnycake

I wrote this lovely missive about Easter, and bunnies and cakes.  It was delightful, and funny.  And then I lost it.  Why would I not type it up the second I got home?  Idiotic.  If it magically reappears, I will replace this post with it’s intended rant.  Until then, I leave you with photos and recipes.


Bunnycake2

Bunny cake pre-frosting.  This cake was adorable.  It was not however, as delicious as it looks.  It’s so wide that I had to cook it much longer then the instructions said just to have a toothpick come out clean.  And then when we cut into the middle there was still raw batter at the center.  I would have had to char the outside to cook the inside.  The frosting was delicious since I made this buttercream.  I omitted the salt and vanilla.  Next time I make a cake shaped like something I plan on simply cooking different sized cakes and sculpting the shape I want.  I went to art school, I can do that, right?


Pineapple

I also used a lot of pineapple on Easter.  In the cupcakes I made with the abundant amounts of batter I had left over from the cake, in the glaze for the ham, and in the vinaigrette for the salad.


Cupcakes2

Pineapple cupcakes without frosting.


Cupcakes

And with frosting.


Bread_dough

Dough for the rolls.


Rolls

After rising before going into the oven.


Rolls3

I really like these rolls.


Rolls2

You can find the recipe for these here.  They call for bread flour, I used all purpose.  It work’s just fine.


Ham

Here’s the ham.  I didn’t take a picture of the whole thing, which is a shame, it was a thing of beauty.  I made a pineapple, brown sugar, rum glaze.  


Pineapple Brown Sugar Glaze


Ingredients


1 pineapple, peeled and cored

1 cup brown sugar

1 cup white sugar

2 tablespoons dark rum


Directions


1.  Mix all ingredients in a medium saucepan and cook over medium heat until sugars have melted.  Turn heat down to medium low and stew for at least 1 hour, longer if desired.  You are trying to get as much juice to cook out of the pineapple as possible.  Add a little water if necessary.

2.  When ham has 1 hour remaining of cook time, brush ham thoroughly with glaze.  Dump some of the stewed pineapples on top of the ham as well.  Baste every 15 minutes with glaze until ham is done and glaze is nicely caramelized.


Potatoes

I also made hasselback potatoes.  That’s a fancy way to say you slice them without cutting all the way through, and wedge garlic in between the slices.  Then you baste them with butter every 15 minutes.  They are really yummy.


Quiche

I made this quiche too.  I added bacon, because everything is better with bacon.

Josh’s Reese’s Pieces cookies

Cookies_and_ro

My husband and I disagree.


About cookies.  


He’s a fan of sugary, candy-loaded varieties, with no unusual flavors.  I am the opposite.


So I decided to make some Josh cookies.  He’s been trying to get me to for a while.


Every day at work he buys one of these peanut butter Reese’s pieces cookies.  They’re greasy, and heavy, and never soft by the time he brings them home.  He tells me they’re perfect when he buys them.  With not having much to base this on, I made him Reese’s pieces cookies.

I’ve been working on this recipe for quite a while and every time, he says it needs more peanut butter.   This time I think I finally got it right.


I do cringe at using Reese’s pieces.  When I read the ingredient list, I get nervous.  There are things in these candies I don’t understand nor do I care to.  However I have yet to find a natural/organic substitute.  So if you know of one let me in on it.  Please.


Either way, these cookies are good.  They’re soft and fresh from the oven with a glass of milk they are amazing.  There is just enough peanut butter to make them extra moist, and the candies get slightly soft in the baking process.  They are good.  And husband approved.


I would like to apologize for the lack of pictures in this post.  Next time I make these I will add more.  I promise.


You can change this recipe up a bit if you like.  Switching out half of the candies for chocolate chips is a good option.  I also like the tiniest pinch of cinnamon and nutmeg.  That’s not on the husband approved list.  Either way, this is one great cookie.


Rosie wants one too, sadly for her; she did not get her way.


Reese’s Pieces Peanut Butter Cookies


Makes 24 cookies


            Ingredients


1 1/4 cup flour

1/2 teaspoon baking soda

1/4 teaspoon salt

1/2 cup butter + 1tblsp, softened

1/2 cup brown sugar

1/4 cup white sugar

1/2 teaspoon vanilla

1 egg

4 tablespoons peanut butter

1 cup Reese’s pieces


            Directions


1.  Preheat oven to 375 degrees.  In a small bowl mix flour, baking soda and salt.


2.  In a mixer using the paddle attachment beat butter on medium until fluffy approximately 2 minutes.  Add brown and white sugar and beat another 2 minutes.  Add egg, vanilla and peanut butter.  Mix until well incorporated.  Scrape down bowl and mix again.  Add Reese’s pieces and mix briefly until well incorporated.  The paddle from the mixer will break the candies just slightly.


3.  Using a cookie scoop drop cookies onto cookie sheet.  Bake for 8 minutes.  Cookies are done when they look slightly under baked.  Allow to cool on cookie sheets.

Why don’t I live in France Fruit Tarts

Tarts

I REALLY like fancy French pastries.  I want to go to Paris, just to eat.  


I pretty much love French food in general, but the desserts are a cut above anything else.  A new French bakery called La Baguette opened up here a few years ago, which I pass on the way to work almost every single day.  It takes serious willpower for me not to stop there every day.  Again, I would have linked to their site, if they had one.  What is with my favorite bakeries not having websites?  Way to undersell your deliciousness.


I like to get the fruit tarts when I go there.  My husband devours these things.  There’s just something about a perfect tart shell with lusciously smooth pastry cream and fresh fruit.  It makes utterly simplistic ingredients seem so much more expensive.


I’m not completely sold on the recipe I used.  Having never made these, or even anything close before, I looked up a random recipe online.  I really liked the pastry dough.  I overcooked it a bit, but it was tender and flaky, yet held together well.  The custard on the other hand seemed not quite right.  I think it was the egg content.  I plan on making these again, so when I find the perfect custard I’ll let you know.


Don’t let me mislead you.  These are good.  Eat 5 in a row good.


I made mini tarts in petit four shells.  You could easily use this to make one large tart or the typical smaller size tart you buy in a bakery.


You can find the recipe I used here.  Don’t be scared if your custard has lumps, put it in the blender or food processor and they will disappear.  If you use the blender, don’t forget to take out the center insert and cover it with a towel.  Hot liquid in a tightly closed blender=explosion.  Also don’t worry if the custard still looks lumpy.  

Pastry_cream

It’s probably air bubbles.


So try a recipe with room for improvement, maybe you will make it perfect and let me know the secret!

Saturday Morning Doughnuts

Donuts4

Well hello Saturday morning.


How I love you. 


You might be my favorite part of the week.  You let me sleep in, with the exception of a small dog needing to go outside at 6 am, without fail, everyday.  Saturday morning, you are so great.  You are rarely filled with obligations, and are usually quiet.  You let me wake up before my husband, craving some delicious baked goods and a cup of coffee.  Very hot coffee today, since it is snowing in Wisconsin again.


I love waking up on a Saturday morning and baking up some sweet treat for breakfast.  It usually isn’t done before noon.


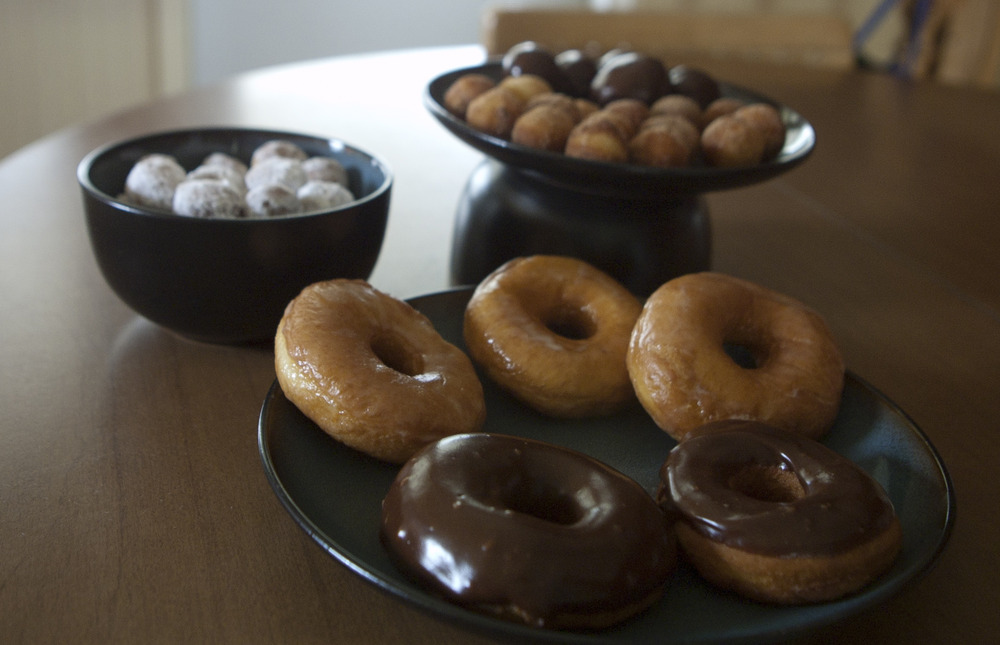
This time I went with doughnuts.


My husband likes doughnuts.  A lot.  We go on late night trips to Greenbush Bakery.  I would have inserted a link here if they had a website.  If you live here, you know them.  They have the best doughnuts I have ever had in my entire life.  In younger, thinner, higher metabolism years, we went there A LOT.


I have long since wanted to make my own doughnuts.  For years I assumed it was far too difficult for me to master.  It all seemed so intimidating, mixing and rising, rolling and frying.  It’s not.  Doughnuts are so easy!  They are however, time consuming.  There’s the rising, and the proofing and the frying.  

Donuts1

 They are not difficult.  They seem almost foolproof.  I started them the night before, to allow them to be made more quickly in the morning.  These doughnuts were my Friday night/Saturday morning project. 


So was waiting outside in the cold, in front of a record store until midnight, to buy actual records.  Made of vinyl.  Happy Record Store Day!  


I have been drooling over this recipe on Joy the Baker’s blog for a while now.  She found two of the most perfect recipes for doughnut making ever.


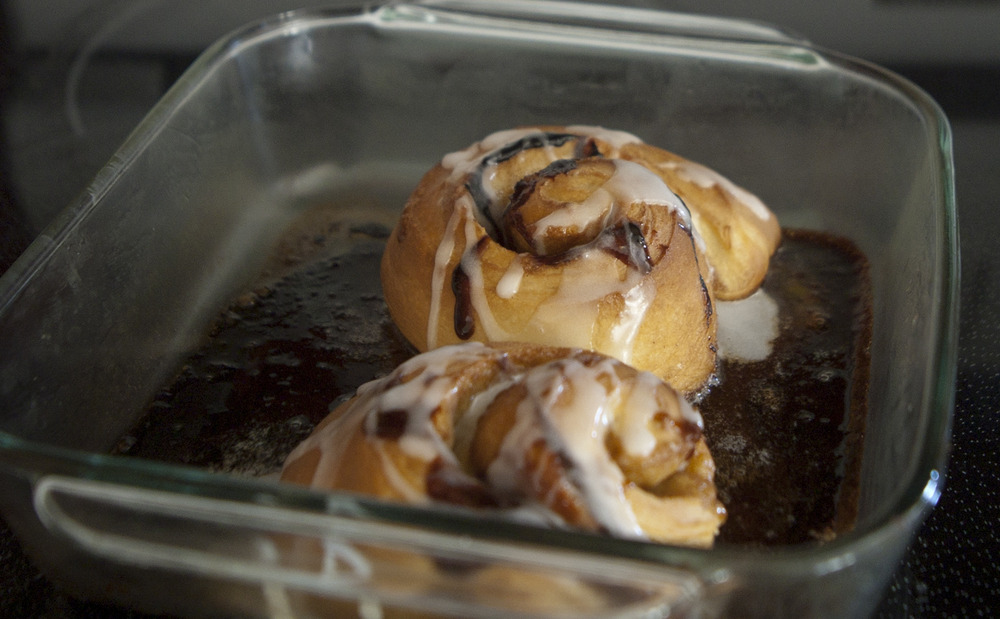
When I woke up this morning, I rolled out the dough, after allowing it to rise last night in a warm spot, then transferring it to the fridge over night.  By noon today I had fluffy, warm, fresh doughnuts.  I dipped them in chocolate, I glazed them, I rolled the doughnut holes in powdered sugar, covered them in chocolate and cinnamon sugar.


This recipe states not to re-roll the scraps.  Here, I say ignore it.  I re-rolled the scraps and ended up with more delicious doughnuts.  I simply could not let all that sweet doughnut dough go to waste.


I now have mountains of doughnuts in my kitchen.  Well, I packed up a number of them to give away tomorrow and my husband and friend did a pretty good job on the rest.  I suggest planning to give most of these away, or making them for an event, otherwise you will eat far too many.


Tomorrow when I give them away, I will make tarts and cookies.


Yum!!


Donuts3


Doughnuts


Recipe from Gourmet, 2006


Makes 1 dozen doughnuts


            Ingredients

1 (1/4-oz) package active dry yeast (2 1/2 teaspoons)

2 tablespoons warm water

3 1/4 cups all-purpose flour plus additional for sprinkling and rolling out dough

1 cup whole milk

1/2 stick (1/4 cup) unsalted butter, softened

3 large egg yolks

2 tablespoons sugar

1 1/2 teaspoons salt

1/2 teaspoon cinnamon

About 10 cups vegetable oil for deep-frying


           Directions

1.  Stir together yeast and warm water in a small bowl until yeast is dissolved. Let stand until foamy, about 5 minutes.

2.  Mix together flour, milk, butter, egg yolks, sugar, salt, cinnamon, and yeast mixture in mixer at low speed until soft dough forms. Increase speed to medium-high and beat 3 minutes more.

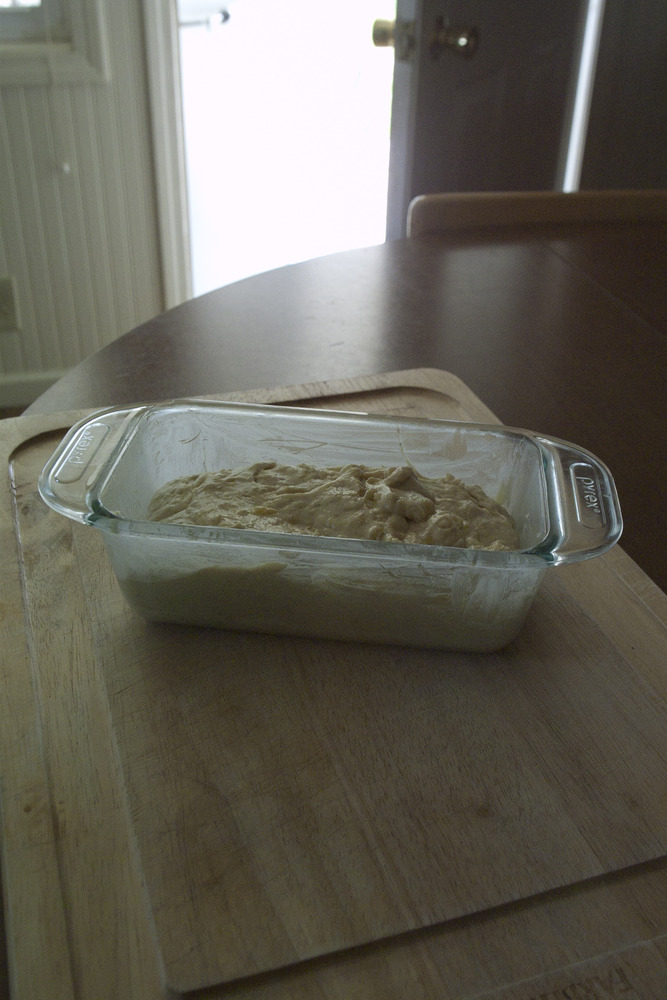
3.  Scrape dough down side of bowl into center, then sprinkle lightly with flour (to keep a crust from forming). Cover bowl with a clean kitchen towel (not terry cloth) and let dough rise in a draft-free place at warm room temperature until doubled in bulk, 1 1/2 to 2 hours.   I then put the dough in the fridge over night, still covered with a towel.

4.  Turn dough out onto a lightly floured surface and roll out with a lightly floured rolling pin into a 12-inch round (1/2 inch thick). Cut out as many rounds as possible with 3-inch cutter, then cut a hole in center of each round with 1-inch cutter and transfer doughnuts to a lightly floured large baking sheet. I don’t have either of these cutters so I used a cup and a large piping tip.  Search your kitchen, you’ll find something.  Cover doughnuts with a clean kitchen towel and let rise in a draft-free place at warm room temperature until slightly puffed, about 30 minutes (45 minutes if dough was cold when cutting out doughnuts). Do not reroll scraps (do re-roll scraps.  Do it.).

5.  Heat 2 1/2 inches oil in a deep 4-quart heavy pot until it registers 350°F on thermometer. Fry doughnuts, 2 at a time, turning occasionally with a wire or mesh skimmer or a slotted spoon, until puffed and golden brown, about 2 minutes per batch. Transfer to paper towels to drain. (Return oil to 350°F between batches.)


Donuts2

Chocolate Glaze 

recipe from Alton Brown


            Ingredients

1/2 cup unsalted butter

1/4 cup whole milk, warmed

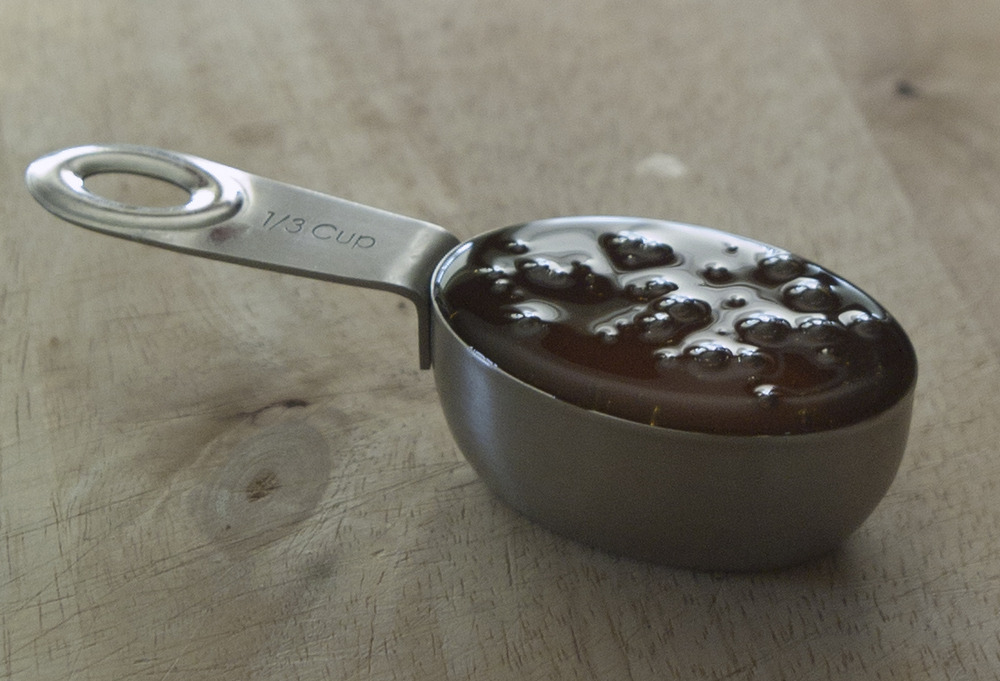
1 tablespoon light corn syrup

2 teaspoons vanilla extract

4 ounces bittersweet chocolate, chopped

2 cups confectioners’ sugar

            Directions

1.  Combine butter, milk, corn syrup, and vanilla in medium saucepan and heat over medium heat until butter is melted. Decrease the heat to low, add the chocolate, and whisk until melted. Turn off heat, add the powdered sugar, and whisk until smooth. Place the mixture over a bowl of warm water and dip the doughnuts immediately. Allow glaze to set for 30 minutes before serving.
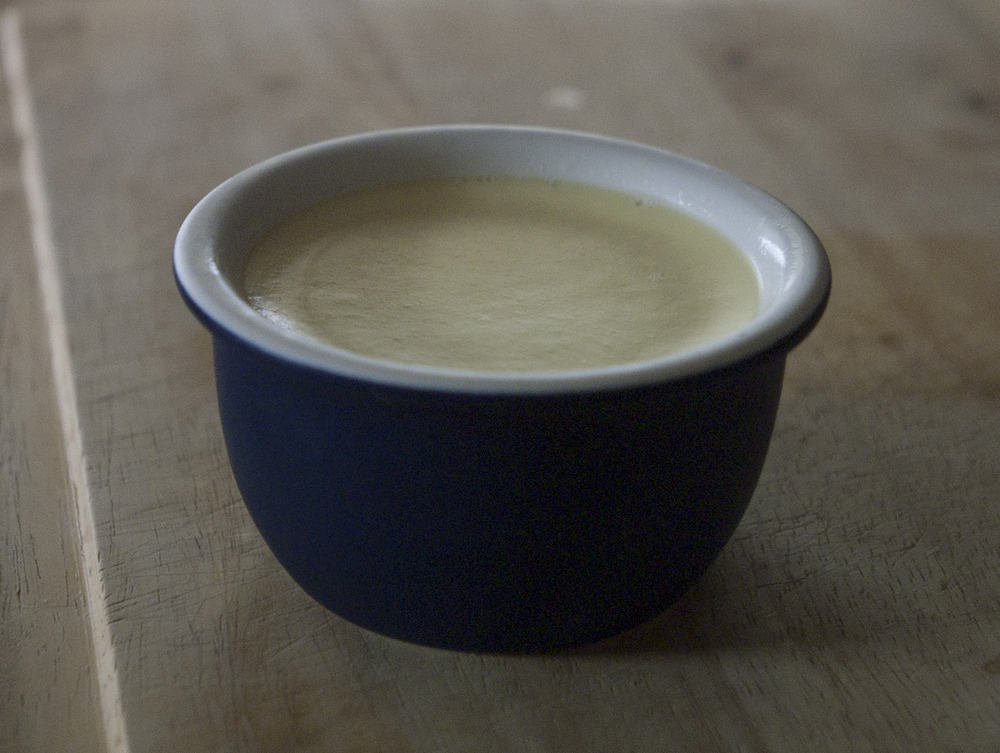


Doughnut Glaze 

Recipe from Alton Brown

Ingredients


1/4 cup whole milk

1 teaspoon vanilla extract

2 cups confectioners’ sugar


Directions

1.  Combine milk and vanilla in a medium saucepan and heat over low heat until warm. Sift confectioners’ sugar into milk mixture. Whisk slowly, until well combined. Remove the glaze from the heat and set over a bowl of warm water. Dip doughnuts into the glaze, 1 at a time, and set on a wire rack placed on a cookie sheet for 5 minutes before serving. 


Tiramisu Farewell

Tiramisu_1

I have a serious problem.


Every time I dream up a recipe, I spend the next couple of days thinking about it, and dreaming about it and tasting it and salivating.  


It’s pretty much torture.  


Then I finally make it, and it’s heavenly.  I end up tasting the recipe throughout pretty much every step of the process.  By the time I’m done cooking I’m usually over it.  I have one bite and tell my husband to finish it.


I guess this is one way to keep from eating a dozen cupcakes.


That’s how this recipe came about.  My beloved co-worker Nick is leaving our office for greener pastures.  Or possibly colder, considering he’s moving to Minnesota.  His crazy antics at work keep me sane.  He makes monkey noises, and dances and leaps onto the desk in one smooth motion.  It’s slightly insane.  But I am going to miss him dearly, so what better way to say goodbye then with cupcakes.  I know, I know, cupcakes again.  But they’re so good!


He is constantly talking about tiramisu.  He wants it at his wedding.  He talks about it a lot.  So, of course, I had to turn it into a cupcake.  He’s not a huge frosting guy, so mascarpone frosting is perfect, since it’s so different then most frosting.  Mixed with whipped cream, it’s light and fluffy and beautiful.  The cake is infused with espresso and rum, and becomes super moist without taking on the heavy quality found in many tiramisu recipes.


Tiramisu_3

These are good.  Really, really good.  And intense.  I dare you to eat more then one of these.  It’s probably not a good idea. 


So try one more cupcake recipe.  You won’t be sorry.  And I promise to lay off of the cupcakes for a bit.  Maybe.


Tiramisu_2


Tiramisu Cupcakes 


Makes 24 regular or 48 mini cupcakes


            Ingredients 

2 1/2 cups all purpose flour          

2 cups cake flour

2 1/4 teaspoons baking powder

1 1/4 teaspoon salt

1 1/4 cups whole milk

1 teaspoon vanilla extract

1 tablespoon plus 1/4 cup dark rum, divided

2 sticks plus 1 tablespoon unsalted butter, softened

2 1/4 cups sugar

6 eggs

1 1/3 cup espresso

Dark chocolate for grating


            Directions


1.     Preheat oven to 350 degrees.  Line two 12-cup muffin tins with baking cups.

2.     Whisk together flours, baking powder and salt in a small bowl.  Stir milk, 1 tablespoon of rum and vanilla in another small bowl.  Beat butter in mixer on medium speed until light and fluffy, approximately 3 minutes.  Add sugar slowly while mixing.  Beat until pale and fluffy, about 3 minutes.  Beat in eggs 1 at a time, mixing after each addition.  Scrape bowl and beat until smooth.

3.     Reduce speed and slowly add 1/3 of flour mixture.  Alternate adding milk mixture and flour mixture until all ingredients added.   

4.     Divide batter among muffin tins.  Using a small cookie scoop is the easiest way to do this, filling each cup with two large scoops (one scoop if doing mini cupcakes).  Bake until a toothpick comes out clean, about 20-25 minutes (about 14 minutes for mini cupcakes).  Cool completely. 

5.  Mix 1/4 cup rum and espresso in small bowl.  Brush cupcake tops with mixture until all liquid is absorbed.  Don’t attempt to do this too quickly, as the cake will fall apart if too much liquid is added at once.   Frost with mascarpone frosting.  These can be refrigerated up to overnight.  Grate dark chocolate over tops just before serving.


Mascarpone Frosting 

            Ingredients

1 cup heavy whipping cream

8 ounces of mascarpone cheese, room temperature       

1/2 cup confectioner’s sugar


            Directions

1.  Beat whipping cream in mixer on medium speed until stiff peaks form.  Mix confectioners sugar and mascarpone in another bowl.  Gently fold mascarpone into whipped cream.


Raspberry Beet Puree Redux

Raspberry_beet_muffins1

I have a slight obsession with all things raspberry.  I think I inherited it from my father.  When I say slight I may be understating things.  I LOVE raspberries.  I think they are pretty much the perfect fruit.  They’re sweet and tart and freshly picked they are something I am unable to resist.  Seriously, I will eat a pint of fresh raspberries in 10 minutes.


So having a lot of leftover raspberry beet puree, I decided to do something with it.  Muffins seemed appropriate.


I love muffins for breakfast.  And pastries.  Pretty much any baked goods.  So I made a batch for this week.  We’ll see if they make it past Tuesday.


These muffins are adapted from a recipe on joy the baker’s blog. I toned down the sugar a bit and tweaked a few other things.  You can find the original recipe here.  Both ways are delicious. 


Warm crumbly berry filled muffins are pretty much heaven.  Especially in Wisconsin, in April, when the floorboards are still frigid when you wake up in the morning.  It’s really not acceptable.  But these muffins are far more then acceptable.


Raspberry_beet_puree_muffins2


Raspberry Beet Puree Muffins 


Makes 12 regular muffins


            Ingredients


6 tablespoons melted butter

1/3 cup milk

1 egg

1 egg yolk

1 teaspoon vanilla extract

1 tablespoon lemon zest

1 1/2 cup flour

1/2 cup sugar

1 1/2 teaspoon baking powder

3/4 teaspoon salt

1 cup raspberry beet puree


            Topping


3 tablespoons cold butter, cut into cubes

1/2 cup flour

3 1/2 tablespoons sugar

Raspberry_beet_puree_muffins3


            Directions


1.  Preheat oven to 375 degrees.  Line 12-cup muffin tin with baking cups.


2.  Melt butter and allow to cool slightly.  Add milk, egg and egg yolk, vanilla and lemon zest, mixing thoroughly.  In another bowl mix flour, sugar, baking powder and salt.  Add wet mixture to dry and mix thoroughly.


3.  In a third bowl make topping.  Mix butter, flour and sugar until mixture becomes crumbly.  I think the easiest way to do this is with your hands.


4.  Using a small cookie scoop, divide batter evenly amongst baking cups.  Divide puree throughout baking cups as well.  Swirl slightly to mix puree into batter.  Sprinkle tops with topping.  Bake for 18 to 22 minutes, until a toothpick inserted comes out clean and topping is slightly golden.