Daddy’s, Poppa’s and Grandpa’s

Dad_amd_dog

My dad and I are ridiculously similar.  Do you see this picture?  This is my bed, every night.  It’s kind of insane.  While I may wish I had my mothers figure, I am glad I inherited a number of things from my father.


Like cooking and baking.  I remember being quite young, and helping my father to make my brothers chocolate birthday cake.  I was wearing a velvet dress.  I think it was blue.  I have a feeling I insisted on wearing it.  Somehow I managed to dump the entire cake down the front of my dress, ruining both the cake and the dress.  But Dad wasn’t mad about it.


I don’t ever remember him mad as a child.  Teenage years are a different story, but I was awful.  Really, really awful.  What is wrong with teenage girls?

Dad_kissing_some_girl

This is quite possibly one of my favorite photo’s of my father.  


I used to love going shopping with my Dad when I was a kid.  He did all of the grocery shopping every Saturday.  Every week he picked up flowers (and still does) for my mother.  When we went shopping or to run errands, I seem to remember coming home with lots of stuffed animals.  I think my Dad was kind of a sucker for my childhood cuteness.

Dad_making_faces_copy

I’m pretty sure I made this face a lot too.


He was and is the best Dad ever.  He is the standard I held every boy I dated, and all but one couldn’t live up.  Even that one probably finds it difficult at times.  My Dad is the perfect mix of a tough guy with a big soft gooey center.  

Mom_and_dad_kissing

He was so much fun growing up, and so smart.  He taught me so much.


He still does.  I feel so lucky to have a normal functioning relationship with my father, that so many people I know lack.  He’s become my friend, someone I go to for advice and the best doggie grand-dad around.


This fathers day I made him cinnamon rolls.  He requested this quite a while ago.  So, go do something nice for your Pops and don’t forget, Daddy’s love sweets, so make him some.

Flatbread with Tomatoes, Onions, Basil and Balsamic

Finished

hate summer.


Okay maybe that’s a lie.  


I’m sort of a delicate flower.  There’s an extremely large chance I turn beet red when it’s hot.  Like 74° hot.


I probably should have been born in the Pacific Northwest, or maybe my Scottish roots are simply too strong.  Living somewhere that the heat index never surpasses 70° sounds grand.


My skin is extremely pale.  So sun is not my friend.  At all.  I wear SPF moisturizer daily, and sunblock regularly.


Which by the way, why is sunblock so expensive?  And greasy?  And smelly?  My SPF moisturizer is lovely, but far too expensive to use anywhere but my face.


So, while I hate the heat, I love how the summer allows me to turn my back yard into a lush garden.  Walking in the backyard to get fresh spinach, tomatoes and raspberries is fan-freaking-tastic.  I wish I had a garden year round.


But not enough to move.

Sliced_tomatoes

This past weekend I bought amazingly sweet heirloom tomatoes from the farmers market.  And they were from the seconds, which means half price.  Flawless.  I knew I needed to use them quickly considering they were seconds.


All week long I had been inspired by this flatbread, so I decided to make my own flatbread.  With tomatoes.  And onions.  And basil.  Oh, don’t forget the balsamic and olive oil.  This stuff is so good.  I reheated it every single day since.  And I’m going to reheat it again tomorrow.  That’s four days of deliciousness.  I couldn’t stop.  Every day I see it in my fridge and I can’t-not eat it.  It’s ah-mazing.  Capital AH.  


This flatbread would be perfect for a barbecue or a garden party. You could probably even grill it.  If you’re brave.  I’m not.  Open flames are not quite my forte.


Serve this as an appetizer with a fresh spinach salad.  I think grilled chicken and some sort of berry dessert would round out the meal nicely.


Hmmm I may have to have a garden party.


Raw


Flatbread with Tomatoes, Onions, Basil and Balsamic


Makes 12 slices


            Ingredients


3 cups all purpose flour

1 package active dry yeast

2 tablespoons vegetable oil

1 teaspoon salt

1 tablespoon sugar

1 cup warm water

2-3 heirloom tomatoes

1/2 Medium onion, any variety

Basil (9 large leaves or 2 sprigs boxwood basil)

A few tablespoons olive oil

Balsamic Vinegar

Salt and Pepper to taste


            Directions


1.  Preheat oven to 350 degrees.  Make the dough:  In a small bowl combine sugar, warm water and yeast.  Let stand until foamy.  Add the vegetable oil to the yeast mixture.  In another bowl mix the flour and salt.  Combine all ingredients with a wooden spoon.  When mixture gets to hard to stir, turn out onto a floured surface and kneed until smooth, a couple of minutes.  Roll out to desired size and shape.  This dough should fill a regular size cookie sheet.  Brush cookie sheet with olive oil or dust with cornmeal.  Lightly brush dough with olive oil as well.


2.  Slice the tomatoes and onions.  I choose large slices for the tomatoes and rings for the onions.  Any way works.  If using regular sized basil leaves, chop finely.  Since boxwood basil leaves are so small there is no need to chop.  Arrange ingredients on dough.  Start with tomatoes, then onions and basil.  Lightly sprinkle with salt and pepper.  Brush exposed edges of dough with olive oil again.  Bake for 15-20 minutes until edges are golden and vegetables are roasted.  Drizzle with balsamic while still warm.


Triple Berry Trifle

Trifle

Can I be honest for a minute?


Ok.  Thanks.


So we all know I love baking.  Hello, kind of obvious right?  


Well sometimes I don’t feel like it.  


Sometimes, I get lazy.  I think this has a lot to do with my day job.


I loathe my day job.  Sometimes it sucks out my soul and I don’t get it back until Friday at 5:30pm.  There is nothing rewarding about the world of subprime lending.  Nothing.  It wears me out.  And sometimes, I just want to lie on the couch and watch trashy vampire shows and forget the world.  That’s when I get lazy.


This weekend I needed to make a dessert for a barbecue with friends.  I volunteered for dessert, because, well, duh.  Saturday came around and I still had not made anything.  I was pretty sure I wanted to make a trifle.  It’s beginning to look like summer in Wisconsin, which more often then not means hot and muggy.  Trifle sounded refreshing to me.

Raspberries

So there I was. Saturday at 2:00 with nothing made and three hours until I needed to leave.  I went to the store to get the last couple of things I needed and told my husband I might just buy pound cake for the trifle.  He looked at me like I was crazy.  I decided we better hurry back home so I could get started.
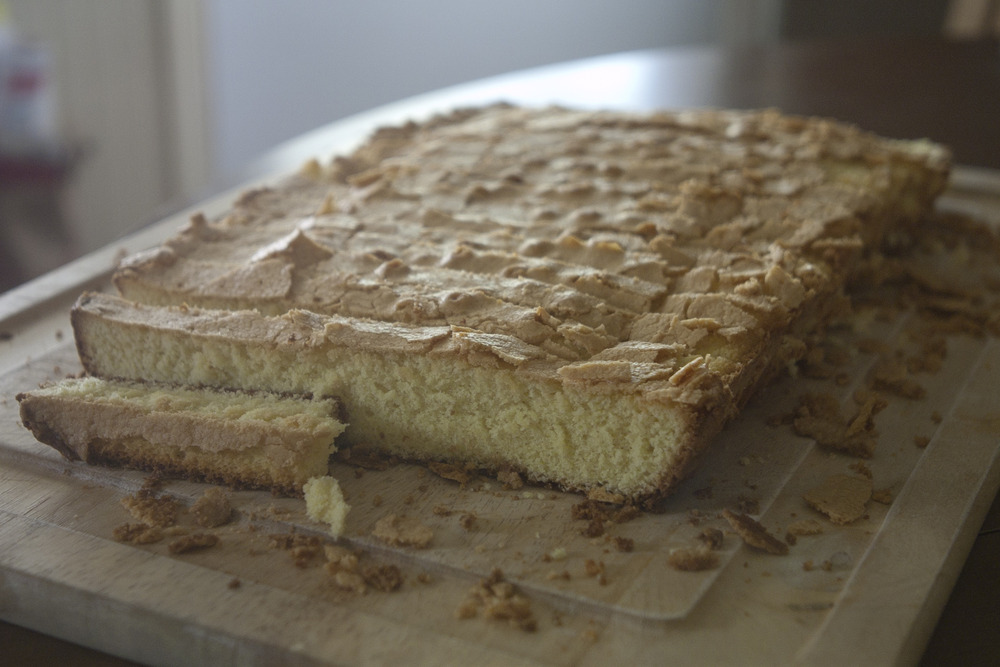
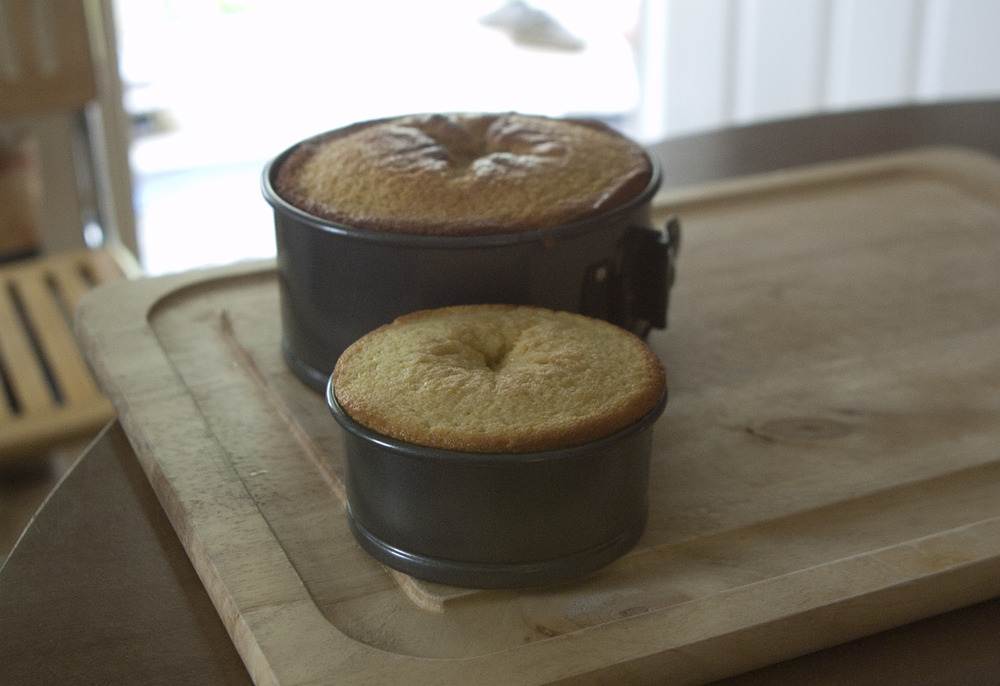
 

I made pound cake.  

Pound_caek

From scratch.  This was probably the easiest thing I have ever made.  Five ingredients, 9×13 pan, 1 hour and presto change-o, you have pound cake.  It gets all flaky and airy on the top, and spongy delicious in the middle.  Damn good.


So at 3:30 I’m pulling pound cake out of the oven with an hour and a half to cool it, make the filling and assemble the trifle.  Oh, also I was smelly, so a shower was in order as well.


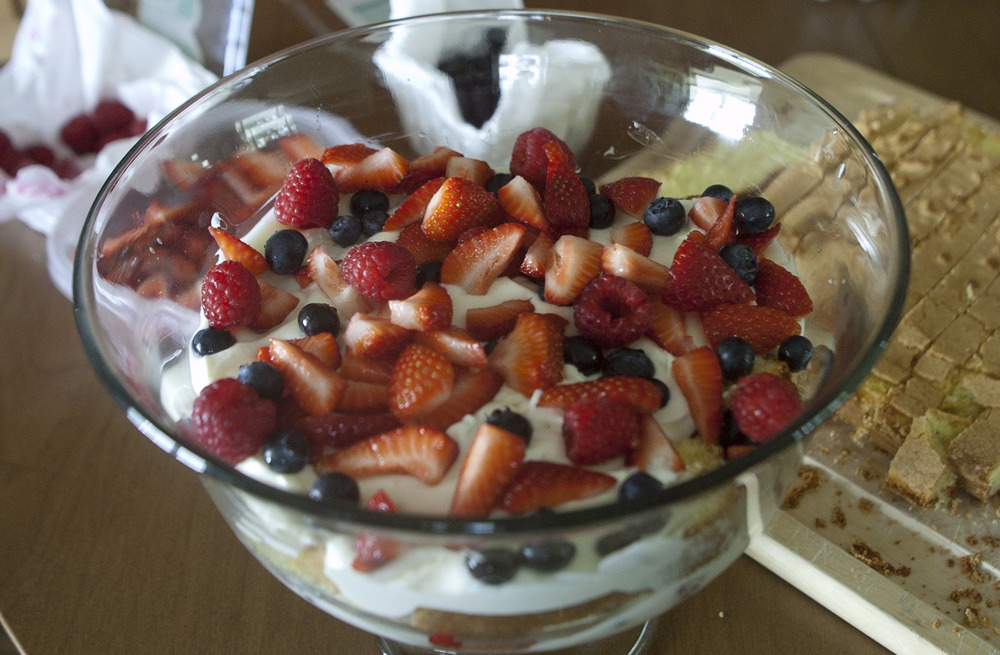
Somehow I pulled this off.  Once the cake was cool enough I turned it out onto a cookie sheet and put it in the freezer.  I made the lemon syrup for the cake.  I whipped the cream and cream cheese together while the cake cooled.  It just kind of came together absolutely perfectly.

Layers

It was so pretty.  I took it on the back porch to take pictures and the dogs helped themselves to some of the left over pound cake.  Good job dogs.


Everyone at the barbecue seemed to like it.  

Crw_1592

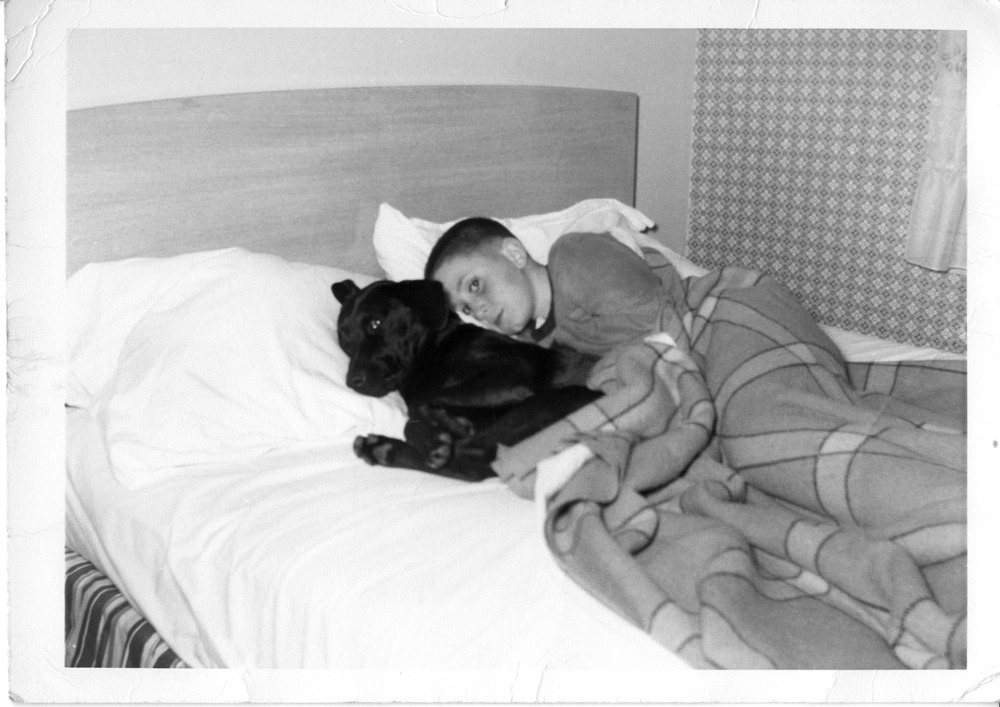
I’m pretty sure this guy did.  He also seemed to enjoy the sugar high afterwards.


Really how could you not, pound cake, berries, whipped cream, come on I could eat that for breakfast everyday.


Trifles are good desserts to take to a party because they look impressive.  Get a pretty trifle dish.  It helps.  The rest is easy.  Really, really easy.  You don’t have to make the pound cake from scratch, but I highly recommend it.  Plus it makes enough for you to eat the scraps at 6 am when your dog wakes you up for breakfast.


Triple Berry Trifle

Layers_2

Serves 8-10


Ingredients


1 recipe pound cake (or store bought loaf)

1 pint strawberries

1 pint raspberries

1 pint strawberries, chopped

1/3 cup lemon juice (approximately 2 lemons)

2/3 cup sugar divided

2 cups heavy whipping cream, divided

8 ounces cream cheese softened


Directions


1.  In a small saucepan heat 1/3 cup of sugar with 1/3 cup lemon juice.  Stir occasionally until sugar is dissolved.  Remove from heat and set aside.


2.  Cut pound cake into 1/4 inch slices.  Brush slices with cooled lemon syrup.


3.  In a mixer combine cream cheese with remaining 1/3 cup of sugar.  Beat until light and fluffy.  Slowly stream in 1 cup of cream.  Beat until soft peaks form.  In another mixing bowl, beat remaining 1 cup of cream until stiff peaks form.


4.  Begin layering trifle.  Start with pound cake.  Cut cake slices to fit bottom of trifle dish.  Next dollop half of the cream cheese mixture on top of cake and spread evenly.  Top with 1/3 of the berries.  Make sure all layers come all the way to the edge of the dish.  This will ensure that you see every layer through the side of the dish.  Repeat process again starting with pound cake, the remaining cream cheese mixture and more berries.  The last layer will be the same; only you will use the whipped cream on this layer.  Top with remaining berries.  Cover with plastic wrap and refrigerate at least 1 hour and up to 6 hours before serving.


Pound Cake


Ingredients


2 cups flour

2 cups sugar

2 sticks of butter, softened

3 teaspoons of vanilla

5 eggs


Directions


1.  Preheat oven to 350 degrees.  Cream together butter and sugar.  And flour in four additions.  Add eggs, mixing after each one.  Add vanilla.  Beat until smooth.  Bake for 1 hour or until a toothpick inserted in the center comes out clean.

What I’ve been up to lately

Img_1008

There is not a single sweet in my house right now.


Not one.  


This is a problem.  Seriously.  


Someone needs to do something about this.  Soon.


I made this homemade ice cream.


I’ve been neglecting my cooking and baking a bit lately.


I’ve been busy.


Making mini muffins.

Mini_muffins

And pizza.

Img_1001

Playing with my dogs.

Regal_rose_bw
Rock_doc_bw
Rocko_bw
Rose_on_couch
Rock_sniffers_bw
Rose_mcnose_bw
Proud_rock_bw

 Planting a garden.


Cilantro
Peppers
Lemon_thyme
Pineapple_mint

Making salads.


Salad

And quiche.

Img_0992

Alas, I’ve yet to tackle any new projects, I have been busy.  I had some time off. It was amazing.  I took these pictures.  I made these things.  And I relaxed. 


Yes please.


Here’s what I did with the ice cream.  I attempted to remember the recipe I used at Milkweed.  This is what I did at home, not sure if it was right but it tasted good! 


Heat 2 cups of cream with the seeds and pod of 1 vanilla bean.  Prepare an ice bath.  Mix 4 egg yolks with 6 tablespoons of sugar.  When milk just begins to boil mix a small amount into yolk and sugar mixture to temper.  Continue adding slowly until completely incorporated.  Return to medium heat for additional 2-3 minutes, until mixture coats the back of a spoon and begins to tighten up.  Pour through a sieve into another container in the ice bath and whisk occasionally until completely cooled.  Transfer to an ice cream machine and follow directions for machine.  When it reaches soft serve consistency transfer to another container and freeze at least 4 hours.  Eat and yum!


It’s birthday time!

Finished

I like birthdays.  And holidays.  And special occasions.


I like to make things for them.  There’s a good possibility I will make myself a birthday cake this year.  Because I want to.  Because that’s how I roll.  I like to try to make the most challenging thing I can, but still have it be appealing to the people I am cooking for.  I like complex things.  I like to try something that there is a 90% chance I will fail at making and have to start over.


It’s how I learn.  I’ve yet to screw something up twice.  And I don’t get discouraged.  Just do the dishes and start over, this time with more knowledge and a better game plan.


That’s how I like to cook and bake.  Someday I am going to make every single recipe in Thomas Keller’s cookbook from The French Laundry.  I’ve yet to receive this as a gift so I haven’t begun on this task yet (hint, hint).  To date I’ve tackled two recipes.


The thing I love about this cookbook is that while a number of the recipes are quite complex, when you boil them down, really read them first, they’re not all that difficult.  They are challenging, but in a good way. 

Unfrosted

 Back to birthdays.


It was my mother’s birthday a few weekends ago, and as I said before, I made her a cake.  It was cute, and small, and white.  With lots of buttercream. 

Oranges

 There were also oranges and zest and cream.


This cake was intense.  And intended as such.   Okay, possibly a bit too intense considering the time it took to bake completely.  But it was good.

Boxed


I used this recipe, which I will be using for a function later in the summer, and made a few changes.   I will probably use it in its pure form this summer; as I will be doing cupcakes and I think lighter is better.  Since I used cream in this cake instead of milk it was quite dense, and took longer to bake.  I took it out a little early, hence the slightly sunken look in the unfrosted photo.  Don’t worry if that happens, as long as the center is done.  You probably need to cut off the top anyway to get it flat.


Next time I’ll get 4 cake pans.  I used springform pans this time since it was what I had.  It worked fine, but would turn out better in thinner pans.


In June I’ll get another chance to try since my husband will be having a birthday.  


Saturday work

Img_0982

I spent my saturday helping out our friends at Milkweed.

Img_0979

I made some ice cream.

We moved some rocks.

We put some dead trees in the ground and strung up some lights.

It was a good time.

It was a lot of work.

We ate grilled cheese with asparagus and goat cheese for lunch.  

We drank espresso and beer.

I took some pictures.

I made some stuff.

It was a good day.

Img_0981
Img_0980

There was raspberry sauce involving tequila.

Img_0984
Img_0983
Img_0985

There was rhubarb stewed in simple syrup, which will later be dehydrated.

Img_0989
Img_0988
Img_0990


It was a pretty great Saturday afternoon.

Searching for flour

Unbaked_pie

I’ve been playing around with flour lately.  I really want to use a locally made organic brand.  I found some at the farmers market the other day and decided to test it out.


I bought wheat bread flour and wheat pastry flour.  The first thing I tried it with was a cookie.

Chocolate_chip_cookie_dough

I didn’t even take a photo of the finished product, they were too runny, and although tasty, not what I was looking for.


Next I made piecrust.

Dough

  That came out perfectly. 

Pie_crust

 I made this delicious berry pie.

Unbaked_topping

It was really good, and warm with a scoop of vanilla ice cream is something I dream about.

Baked_pie

Next I tried turnovers.  I filled them with blueberries and cream cheese. 

Cream_cheese

 They were good, however I think the recipe I used for the crust could have used more sugar.  

Raw

The dough somehow tasted savory.  

Turnover

So I glazed them with lemon sugar glaze.

Finally I made bread. 

1st_rise

 It was good, but it wasn’t perfect.  

2nd_rise

It didn’t rise as much as I wanted and seemed too dense.

2_risen

Finished_bread

So, I decided this flour wasn’t what I wanted to use.  Sadly as I liked that it came from nearby and that I knew where the wheat was grown.  It’s probably for the best however, considering a small two-pound bag cost $5. 


I am still on the quest for the perfect flour.  When I find it, I’ll let you know.  I like the idea of knowing where all of my food came from, even the smallest of ingredients.

Cakes, cakes and more cakes!

Frosted_whole

Ok so here’s the deal.


I’m not perfect.  Yes, I make a lot of delicious stuff, but pastry chef I am not.


This stuff is all still kind of new to me.  I’m pretty much learning it all as I go.  And sometimes I make mistakes, or things don’t come out quite perfect.


So, I’m not going to edit, or censor.


Every single baked good I make, and even some of the savory things will end up on here.  Hopefully, it will help me get better.


Right now I’m working on tiered layer cakes.


They’re really not that difficult, but to a perfectionist also not that simple.  I want my cakes to come out looking like something from a Martha Stewart magazine.  Probably a bit of a stretch considering I’ve made a total of two so far.  For the first two, I think they’re pretty good.


The first cake was practice for the second.  I wanted to give my mother a beautiful little layer cake for her birthday.  I had cocoa powder so I thought a chocolate cake would be nice.  And considering my slightly insane love of raspberries I thought I would fill the layers with raspberry purée.  It was pretty amazing.


The cake was moist and intensely chocolate.  The raspberry complimented it perfectly.  The frosting was just ok.  I used the basic frosting recipe from Hershey’s (even though I wasn’t using their cocoa powder).  I remember loving this frosting as a kid.  Now it seems far too sweet and slightly grainy.  I also made mini cupcakes with the left over batter.

Completed

They were filled with raspberry and quite cute.

Fillled2


Frosted

The second cake I made for my mother was an orange buttercream cake.  It was damn good.  And very rich.  It turned out looking much better then the chocolate cake.  Buying a cake-frosting spatula helped immensely.  I will post that recipe soon.


 I have a goal to make a wedding cake for someone.  So I will continue working on my cakes, and eventually I will make a gorgeous, huge, tiered layer cake that looks good enough for Martha.


Good tools are key for these types of cakes.  So is buttering and flouring the pan.  They’re not that hard and look quite impressive, I would definitely recommend trying them to impress someone for their next birthday.


Chocolate Raspberry Layer Cake


            Ingredients

1 cup coffee

3/4 cup cocoa powder

1/2 whole milk

2 cups flour

1 1/4 teaspoon baking soda

2 sticks of butter softened

1 1/4 cup brown sugar

3/4-cup sugar

4 eggs

Directions 


1.  Preheat oven to 350 degrees.  Butter and flour 2 pans, you can use a variety of shapes, sizes and types.  You want to make enough cake to have layers and tiers as well.  I used an 8-inch spring form and a 4-inch.  I then had to slice each finished cake in half. 

2.  Brew 1 cup of strong coffee.  Mix cocoa powder in with coffee until dissolved.  Once cooled add milk.

3.  In another bowl mix flour, and baking soda.

4.  In a mixer using the paddle attachment cream butter and sugars together.  Add eggs one at a time until well blended.  Add flour mixture and coffee mixture alternating, starting and ending with flour.

5.  Pour into cake pans, filling 3/4 full.  Place pans on cookie sheet and bake until a toothpick inserted in the center comes out clean.  Times will vary based on cake pan size.  The timing I use goes a little like this:  14 minutes for mini cupcakes, 18 minutes for regular size cupcakes, 20 minutes for smaller cake pans and 40 minutes for larger cake pans.  Just watch them, and keep a toothpick handy.  It’s not that hard.  I promise

6.  Once cooled place cakes in the freezer for about 20 minutes.  This makes them much easier to slice.  Slice cakes in half, as well and leveling the top.  Leveling isn’t necessary but helps.  Start with the bottom tier first, fill with raspberry filling.  All I did was cook a bag of frozen raspberries for 20 minutes with 4 tablespoons of sugar.  Put top on first tier and return to freezer for another 20 minutes.  Repeat this process with the second tier.

Cake_layers

7.  Frost the layers.  Start with the bottom layer, putting a large amount of frosting on the top and working your way to the edges.  Allow the frosting to fall over the edges and smooth along the sides.  Put the second tier on top and repeat the process.  Using a frosting spatula will allow for much smoother frosting.

1st_layer_frosted

Here’s the recipe I used for the frosting.


Salad Shooter!

Finished_salad

Remember Salad Shooter?


I definitely do.  I have a distinct memory of the scene from Benny & Joon where the men are playing poker, and Oliver Platt throws a salad shooter in the pot.  He sings the little jingle and everything.  Pretty much since seeing that movie as a kid every single time in my life I have uttered the words “salad shooter” I have sang them in the same fashion.  That movie rocks.


This really doesn’t have all the much to do with salad shooters; it’s really just a salad.  


Salad?  Yes, yes I do make savory things.  Every once and a while.  Or maybe every day.  I like to cook.  More then most normal 40 hour a workweek people.  A lot more then I like to do dishes.  I’ve yet to convince my husband that the dishes are his job every time I cook.  I’m still working on it though.


Back to salads.  


When spinach and lettuce are in season (locally that is) I attempt to eat a salad every day.  I won’t lie and say that I accomplish this goal, but never the less, I try.  I really like salads.  And runny poached eggs.  I could eat a salad with the right toppings as a meal every day.


This one is more of a side dish, but could easily be made into a meal.  I was inspired by a recent recipe from Martha Stewart.  Take this as more of a suggestion, then a recipe.  Get inspired to eat salad and put your own twist on it.  It’s easy.  

Potatoes_shallots


I chopped up some potatoes with shallots.  I crisped up some bacon.


Cooked_potatoes_shallots


I poached an egg.  I topped the spinach with the hot potatoes, shallots, and bacon. I drizzled it with olive oil and balsamic.


It was so good.


Runny egg yolk on a salad is like heaven.  Try it, even if you’re scared of runny eggs.  Try it.

Broken_yolk


Yum.

Cupcakes for my Momma

This is my mom.

Mom_by_pond


She was a total hippie.  And pretty gorgeous too, right?


She’s pretty much the most amazing woman ever.  Seriously. You wish she was your mother.  I can’t imagine having a better mother.  She’s a writer, so she was always around when we were growing up.  I have these warm fuzzy memories of doing crafts at the kitchen table.  They all seem to blend into one mishmash of light and colors and sound.  And a feeling.  That wonderfully blissful feeling that comes from being young and loved and protected.  I am really lucky to have grown up with such an amazing mother.


This mothers day I decided to make her cupcakes.  And brunch.  My mom likes frosting.  Really good frosting.  She would probably just settle for a jar of it and a spoon.

Qa_cupcake


I was trying to think of something light and springy that would be perfect for mother’s day.  I tossed around a number of ideas and finally settled on Pear Honey Ginger cupcakes using preserves from Quince and Apple.  They make local preserves here in Madison and they are so good.  Totally worth the price and pretty amazing.

Quince_and_apple


I swirled the jam in the batter, in the frosting and put a nice jammy center in the middle of the cupcake.  

Batter


The flowers on the top are practice for my parent’s upcoming anniversary party, for which I am baking a ton of cupcakes this summer.  They’re pretty cute aren’t they?  

Flowers


They took quite a lot of practice, but after about 70 I got the hang of it.


So these are my cupcakes for my mom.  They don’t in any way begin to express how great my mom is.  But, they’re delicious and she requested baked goods, so hopefully they are a small token of my gratitude for being raised by such a wonderful woman.


Pear Honey Ginger Cupcakes

Makes 24 regular or 84 mini cupcakes


           Ingredients

2 1/2 cups all purpose flour          

2 cups cake flour

2 1/4 teaspoons baking powder

1 1/4 teaspoon salt

1 cup whole milk

1 tablespoon vanilla extract

1/3 cup Quince and Apple Pear Honey Ginger preserves

2 sticks plus 1 tablespoon unsalted butter, softened

2 1/4 cups sugar

6 eggs

Unfrosted_pear


           Directions


1.     Preheat oven to 350 degrees.  Line 12-cup muffin tins with baking cups.

2.     Whisk together flours, baking powder and salt in a small bowl.  Stir milk and vanilla in another small bowl.   Beat butter in mixer on medium speed until light and fluffy, approximately 3 minutes.  Add sugar slowly while mixing.  Beat until pale and fluffy, about 3 minutes.  Beat in eggs 1 at a time, mixing after each addition.  Scrape bowl and beat until smooth.

3.     Reduce speed and slowly add 1/3 of flour mixture.  Alternate adding milk mixture and flour mixture until all ingredients added.   

4.     Divide batter among muffin tins.  Using a small cookie scoop is the easiest way to do this, filling each cup with two large scoops (one scoop if doing mini cupcakes).  Bake until a toothpick comes out clean, about 20-25 minutes (about 14 minutes for mini cupcakes).  Cool completely.  Fill center with jam using a piping bag.  Cutting a small cone out of the center of the cupcake is the easiest way to insure there is enough jam.  Frost with cream cheese frosting once jam center has set for a few minutes.  Decorate tops with buttercream flowers.


 Cream Cheese Frosting

Frosted


Ingredients

8 ounces cream cheese

1 stick unsalted butter, softened

2 cups confectioners’ sugar

2 tablespoons Quince and Apple Pear Honey Ginger preserves

1 tablespoon vanilla extract


            Directions

1.  Beat cream cheese in a mixer on medium speed with paddle attachment until smooth.  Add butter and beat until light and fluffy.  Add preserves.

2.  Reduce speed to low.  Add vanilla.  Slowly add sugar.  Beat until Smooth.  If frosting seems thin add up to 1/2 cup more confectioners sugar.