Trying to find an appetite

I have not cooked since December 21st. That’s insane. That’s a record or something. I cook or bake every single day, almost every meal. My body has betrayed me, and my stomach is my number one enemy.

See the thing is I’m pregnant. And apparently to my body, that means eating is nearly impossible. I’m not glowing. I’m sick as a dog, feel like vomiting 24 hours a day agony. It’s not pretty. I’ll find something I want to eat and no sooner then I put it in my mouth I feel like it is going to come back up.

I haven’t wanted to think about, write about, make or eat food. It’s actually quite sad. I’m desperately counting the days until this potion of the show is over.

And my husband. My poor husband, who doesn’t cook and has had to suffer through along with me. If you know him at all, you know he is not adept in the kitchen. Making spaghetti is about as far as he goes. I feel a bit like I’ve abandoned him, poor guy.

They tell me I have 3-7 more weeks of this part. I’m really really hoping it’s just 3 weeks. Especially if my boss keeps eating Swiss cheese everyday. Seriously it makes me want to die. It has been getting progressively better. I made pancakes this past weekend and really enjoyed them. Not so great that I’m cooking and eating like myself, but I can choke down food without gagging these days.

So my promise to you, is that I will be back soon with new posts and recipes sure to please. As soon as I’m done being nauseous.

Back from holiday land

20120104-154038.jpgThis Christmas I made this toffee topped with chocolate and citrus salt.20120104-154313.jpgI gave people this vanilla extract.

20120104-154655.jpgI made these way too hard passion fruit caramels.

20120104-154754.jpgAnd covered them in chocolate to disguise their jaw breaking ways.

20120104-154954.jpgI cooked down raspberries into jam to mingle with brie inside puff pastry bites.

20120104-155139.jpgI made hot cocoa mix and homemade Limoncello. Consider yourself lucky if you received some of the booze. It was quite lovely.

20120104-155838.jpgI made a boat load of cookies with my dad.

20120104-160120.jpgI made popovers from this cookbook and filled them with potatoes, peas and bechamel sauce.

20120104-160524.jpg I made homemade pasta from this and loved it just as much as the last time I made it.

20120104-160800.jpgI whipped up hundreds of cupcakes for the coolest New Years Eve wedding.

Hung out with some wacky cats at my mother in-laws.

And spent time with those I love the most.

20120104-161423.jpg

20120104-161516.jpgI hope your holidays were as filled with love as my own and promise to bring you full posts and recipes soon!

Thanksgiving #3, with Ad Hoc

20111212-095352.jpgI really like cooking for people. Do you? I think it’s really fun to make a huge meal and have everything done at just the right time and sit down and eat with people you love.

I especially like the part when everyone gets quiet. You know, when they’re all eating happily and no one wants to talk because at that point the food is more important. I like that part. It means I did a good job.

20111212-095513.jpgI made this meal for my family the weekend after thanksgiving. I decided to tackle a few recipes from Ad Hoc. I think it went pretty well. The beef short ribs I made are probably one of the most delicious renditions of beef I have made. And the possibilities for the leftover beef are endless.

20111212-095653.jpgI started off the meal with a caramelized onion and mushroom squash bruschetta. It was probably one of the most delicious starters I’ve ever made. Simple, pretty and irresistible.

20111212-095839.jpgI served wedge salads because I like the way the look. They’re a bit too much salad for me, however. Maybe if I was only eating a salad, but there was beef and side dishes to be had.

I served the beef with a creamed spinach and a chive and bacon mashed potato. It was a robust hearty meal, the kind best served with falling snow and no intentions of leaving the house.

20111212-095958.jpgOf course this being my house, I made dessert as well. I made soft gingersnaps and sandwiched a helping of homemade pumpkin ice cream in the center. The combination was insane. It was a simple dessert whose flavor brought up the level of elegance to something far above your typical ice cream sandwich. Here’s. The recipe I used for the cookies and for the ice cream.

Thomas Keller’s Beef Short Ribs

Red Wine Reduction

Ingredients

1 bottle dry red wine
1 cup 1/2 inch diced yellow onion
1 cup 1/2 inch thick slices peed carrots
1 cup 1/2 inch thick slices white and light green parts leeks
1 cup thinly sliced shallots
1 cup thinly sliced button mushrooms
3 thyme sprigs
6 flat leaf parsley sprigs
2 bay leaves
1/2 teaspoon black peppercorns
3 large garlic cloves, smashed, skin left on

Braise

Ingredients

2 1/2 pounds boneless chuck short rib
salt and pepper
flour
canola oil
1 cup 1/2 inch diced yellow onion
2/3 cup 1/2 inch thick slices peeled carrots
1 1/2 cups 1/2 inch thick slices white and light green parts leeks
2 garlic cloves, smashed, skin left on
3 thyme sprigs
2 bay leaves
about 5 cups beef stock

1. Combine all the ingredients for the red wine reduction in a large heavy ovenproof pot that will hold the meat comfortably. Bring to a simmer over high heat and reduce the heat to maintain the simmer for 45 to 50 minutes, until the wine has reduced to a glaze.

2. Season the meat generously with salt and pepper, coat in flour, patting off any excess. Heat canola oil in a large saute pan over high heat until it shimmers. Add the meat, reduce the heat and brown the meat for 3 minutes. Turn the meat and brown the other side. Remove meat from pan.

3. Preheat the oven to 350˚F.

4. Add the onion, leeks, garlic, thyme and bay leaves to the wine reduction and toss. Cut a piece of cheesecloth about 4 inches larger than the diameter of the pot. Place it over the vegetables and put the meat on the cheesecloth and fold over the edges to form a “nest” (Um yea, I totally did not do that). Add the stock, it should come to just the top of the meat.

5. Cut a parchment paper lid and place it over the meat.

6. Put the pot in the oven and reduce the heat to 325˚F. Braise the beef for 1 1/2 to 2 hours, until tender.

7. Transfer the meat to a heatproof container. Strain the braising liquid and pour over the meat. Keller has a much more complicated method for this. It’s not necessary for doing this recipe at home. You can keep the meat in the refrigerated in the liquid for up to three days, I froze mine for a later use.

Cranberry Apple Pear Bread

On a Sunday afternoon I decided I needed to bake something.  Not knowing what, I scoured my kitchen.  All I knew was I wanted something breakfasty and something I could make up on the spot. I found pears, apples, oranges and cranberries and that was enough for me.


This bread is the perfect holiday bread.  It’s sweet and studded with fruit.  The cranberries are like sneaky little gems of tartness tucked in between sweet bits of apple and pear.  The orange makes a cameo to brighten everyone else up with its zest and juice.  There’s so much fruit in this bread when you mix it all in it’s like a chunky fruit mix drenched with a bit of batter.Don’t make the mistake I did and pour allllll of the batter into 1 loaf pan.  You know it won’t fit, why are you trying to make it?  Don’t just keep telling yourself it will be big and delicious.  Two pans.  Trust me.


I added some oats for texture and depth.  Other grains would be great in here too. Throw some flax in; whatever you have on hand, it’ll be good, I promise.This bread would make a stunning addition to all of your family parties this season or a welcome sidekick at your breakfast table.  Wrapped well, it will store quite nicely in the freezer and be good as fresh baked when warmed up in the oven for a bit.


Get with this ASAP.  You won’t be sorry.Cranberry Apple Pear Bread


Ingredients


1 stick of butter, softened

1/2 cup sugar

zest and juice of 1 orange

2 eggs

2 cups flour

2 teaspoons baking powder

1/4 teaspoon nutmeg

1/4 teaspoon salt

1/2 cup oats

1/4 cup maple syrup

3/4 cup milk

1/2 cup cranberries

1 medium apple, like Gala, cut to size of cranberries

1 medium pear, any variety, cut to size of cranberries


For the topping:


1/4 cup oats

1/2 cup brown sugar

1/2 cup flour

1/2 stick butter, chilled and cubed


Directions


1.  Preheat oven to 350 degrees.  In a large mixing bowl cream butter and sugar.  Add orange zest and juice.  Add eggs, one at a time, mixing after each addition.


2.  In another bowl mix flour, baking powder, nutmeg and salt.  In a small bowl mix oats, maple syrup and milk.  Alternating flour mixture and milk, add to butter and eggs, beginning and ending with flour, in 3 additions.  Mix until well combined.  Fold in cranberries, apple and pear.  Pour into 2 loaf pans.  Bake for 1 hour or until a wooden skewer inserted in the center comes out clean.

Turkey day!

20111129-201155.jpg

How do you feel about Thanksgiving?

Are you one those people who dreads it? Who hates the idea of eating food until you feel as though you might burst? Or are you one of those people who loves it? Do you love spending time with your family and relish in the act of stuffing your face?

I am definitely the latter. We had 3 Thanksgivings this year. One last weekend combo birthday party with my husbands mother, on the day itself we went to my aunts and the Saturday after my parents came over and I cooked. I love Thanksgiving. Love, love, love. I love turkey and mashed potatoes and stuffing. I love pie and I have even learned to love cranberry sauce..

20111129-201618.jpgAs a child I hated cranberry sauce. My father and my brother always loved it but I couldnt stand the stuff. It was tart and gooey and never tasted quite right to me. In my adult years I’ve learned to love cranberries. It all began with a bottle of cranberry vodka. It was the first infused liquor I ever made. I used a recipe from Michael Chiarello and presented my father with a bottle of it for Christmas. When I tried it I was amazed. It was sweet and tart and not too boozey tasting. It led me to trying cranberry sauce again. And really, really liking it.

My husband loves the canned stuff. He likes the way it sloshes out of the can and the little ridges in its gelatinous surface. He likes how sweet it is and the way you can cut perfect slices out of it. Personally the canned stuff creeps me out. I like to cook down real cranberries, born and raised in Wisconsin. I like to add orange zest and juice, and then some brown sugar and spices. I like how it almost burns my nose when I’m cooking it. I like how it’s still a little tart when it’s done.

This year I put it in a dessert. I spread a tart crust with a bit of frangipane custard and then topped that with my cranberry sauce. Then the cranberries got a gorgeous blanket of sliced pears. Everyone was sprinkled with sugar and then baked. I topped it with brown butter gingersnap ice cream (can you tell I’m a little obsessed with brown butter ice cream right now?). The sweetly spiced ice cream perfectly balanced the tart cranberry. While it baked the cranberries stained the pears a beautiful merlot. This was one pretty dessert. And it wasn’t even difficult. At all. I had so much frangipane left over from last weekend that it was a super simple. I did it all lazily Thursday morning while the ice cream froze and I waited to leave and stuff my face full of turkey. I can almost taste it now. This may be one of my favorite new fall desserts for its ease and elegance. It would wow at a dinner party and dazzle at a bake sale. It slices easily with a sharp knife and holds together well.

For the second round I made some gorgeous short ribs. I’ll tell you all about that meal later. It was simple and amazing. Call some friends, have a cocktail and make them something beautiful.

20111129-202101.jpgPear Cranberry Frangipane Tart

Ingredients

1 recipe tart crust
1 recipe Frangipane
1 bag fresh cranberries
2 oranges, juice and zest
1/2 cup brown sugar
1 teaspoon cinnamon
2 pears
1 tablespoon granulated sugar

Directions

1. Make tart crust and bake 10 minutes without filling. Set aside.

2. Make Frangipane and spread about 1/4 cup along bottom of tart crust.

3. Make cranberry sauce. Put cranberries, orange juice and zest, brown sugar and cinnamon in a medium sauce pan. Heat over medium heat until berries cook down and sauce is reduced, about 30 minutes over medium heat. Set aside to cool.

4. Quarter and core pears. Slice pears thinly. Spread cranberry sauce over Frangipane. Arrange pears on top and sprinkle with sugar. Bake at 350 degrees for about 30 minutes until crust is golden brown and sugar is caramelized. Serve with

Pear Frangipane Tart

This is my mother in law. She’s sort of like Gemma Teller, only not so intense. She does have a bike. She’s one of the strongest women I know.She’s also gorgeous. Do you see that outfit? Those pants? That blouse? Those shoes? Oh and that cute little boy is my husband. If you met her today you’d never guess her actual age.

She’s a pretty amazing mother in law. I know so many people who have trouble with their in laws, but I seriously lucked out in that department. She welcomed me into the family the minute I met her, and made me feel at home. She’s an open caring person. Most holidays are filled with not only her blood relatives, but also those around her who have become family. She’s seriously amazing.And today is her birthday. So I made her dinner. And sweets. I hoped to show her a fraction of the love she’s shown me over the years. And I loved doing it. Alas, I took far too few photos during the process. But I did take a few of the desserts.I made mini éclairs, because I know this is one of her favorites. I also made a pear tart for dessert. And of course, ice cream for the tart. It was spiced brown butter bourbon ice cream. It was everything I love about the holidays in an ice cream. Make it yourself. Seriously an ice cream maker is one of the best investments ever.

Pear Frangipane Tart

4-5 medium pears, and variety

For the filling:

Adapted from Martha Stewart

7 tablespoons butter, softened

1/3 cup almond paste

1/2 cup sugar

2 eggs

1/3 cup cake flour

1 tablespoon cream

1. Cream together butter, almond paste and sugar. Add eggs, one at a time and beat until smooth. Add flour and cream and mix until incorporated.

For the tart shell:

Adapted from David Lebovitz

3 ounces butter

1 tablespoon vegetable oil

3 tablespoons water

1 tablespoon sugar

pinch of salt

1 rounded cup flour

1. Preheat oven 410 degrees. In an ovenproof bowl mix butter, vegetable oil, water, sugar and salt. Place in oven and heat for a few minutes until melted and bubbling.

2. Remove from oven and add flour. Mix until dough forms a ball and pulls away from the edges of the bowl. Place dough in tart pan and slowly spread to edges, bring dough up sides as well. Prick bottom of dough several times with a fork. Bake un-filled for approximately 10 minutes until edges just start to brown.

3. While shell cools, quarter and core pears. Slice each quarter into thin slices. Pour filling into tart shell. Arrange pears in a fan or any other desired pattern. Sprinkle with sugar. Bake for another 20-30 minutes until filling is set and crust is golden brown.

Spiced Brown Butter Bourbon Ice Cream

Adapted from Chez Pim

1 cup unsalted butter

1 1/2 cups milk

1 1/2 cups cream

1/2 cup sugar

6 egg yolks

1 teaspoon salt

1 vanilla bean

1/4 teaspoon nutmeg

1/4 teaspoon cinnamon

1 tablespoon bourbon

1. In a saucepan melt butter on medium low heat. Continue to heat butter once melted, it will start to simmer and spit, so make sure you choose a large pan. Swirl pan occasionally to mix. When butter begins to develop brown specks and liquid butter is caramel in color, remove from heat.

2. While butter is heating in another saucepan heat milk, cream, vanilla bean (seeds and pod), nutmeg, cinnamon, salt and 1/4 cup of sugar.

3. Place other 1/4 cup of sugar and yolks in a blender. Turn on low speed and slowly stream in hot butter by removing lid insert. Once yolks and butter are emulsified slowly pour in milk mixture, straining through a sieve first.

4. Return ice cream mix to saucepan and return to heat, cooking until mixture coats the back of a spoon. Pour into a glass bowl over an ice bath. Once cooled add bourbon and place in a sealed container in the fridge for at least 3 hours. Pour into an ice cream maker and freeze according to manufacturers instructions.

Cider Doughnuts

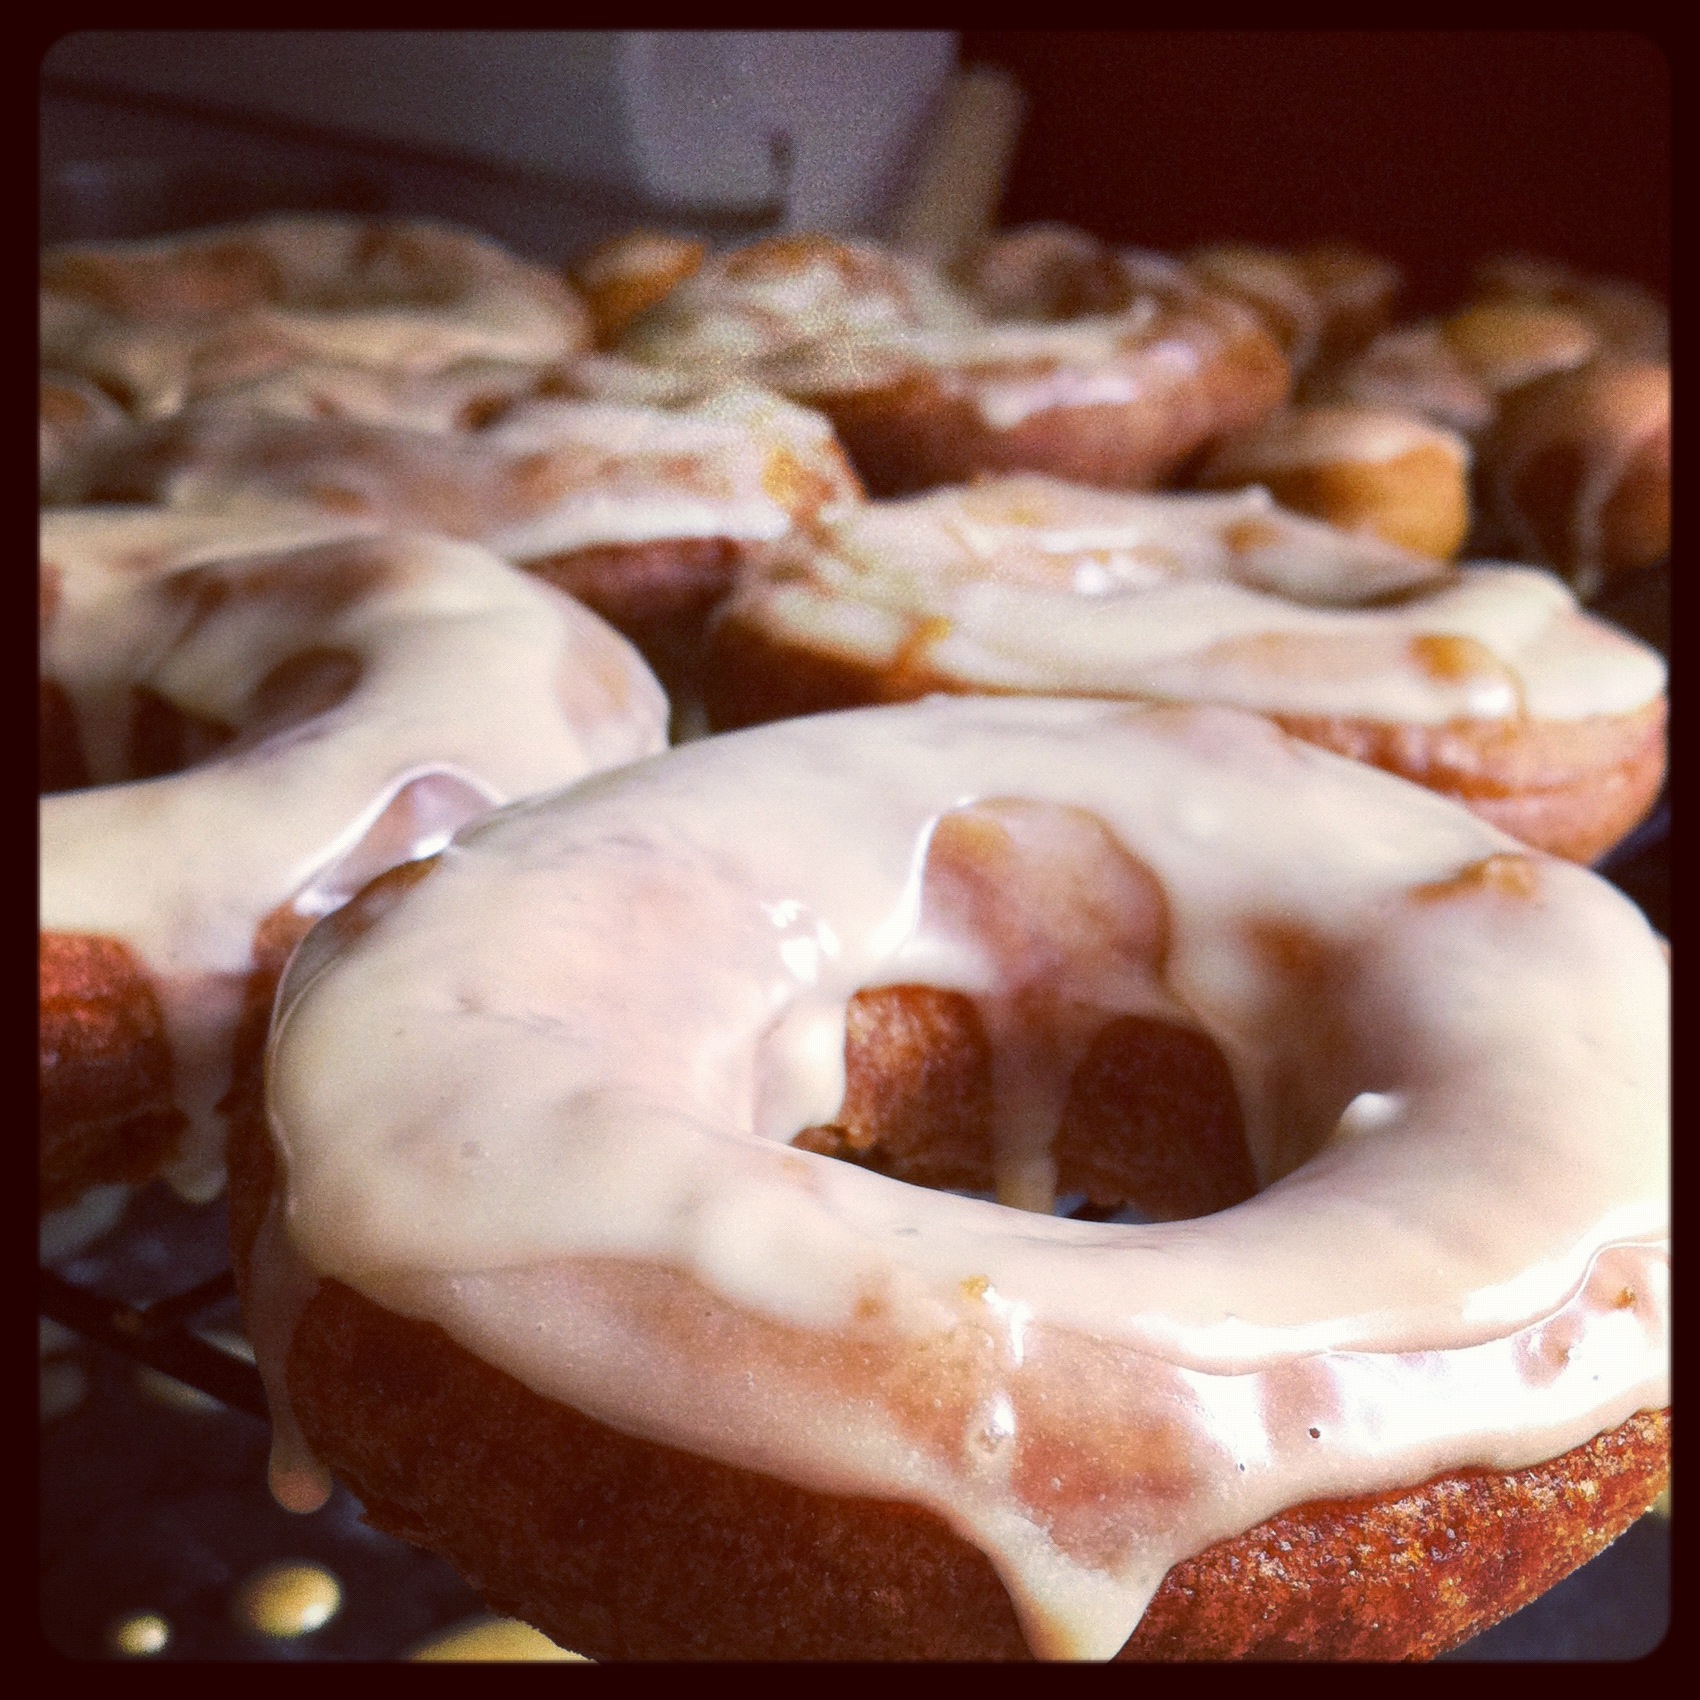
I made you these doughnuts. Apple. Cider. Doughnuts.

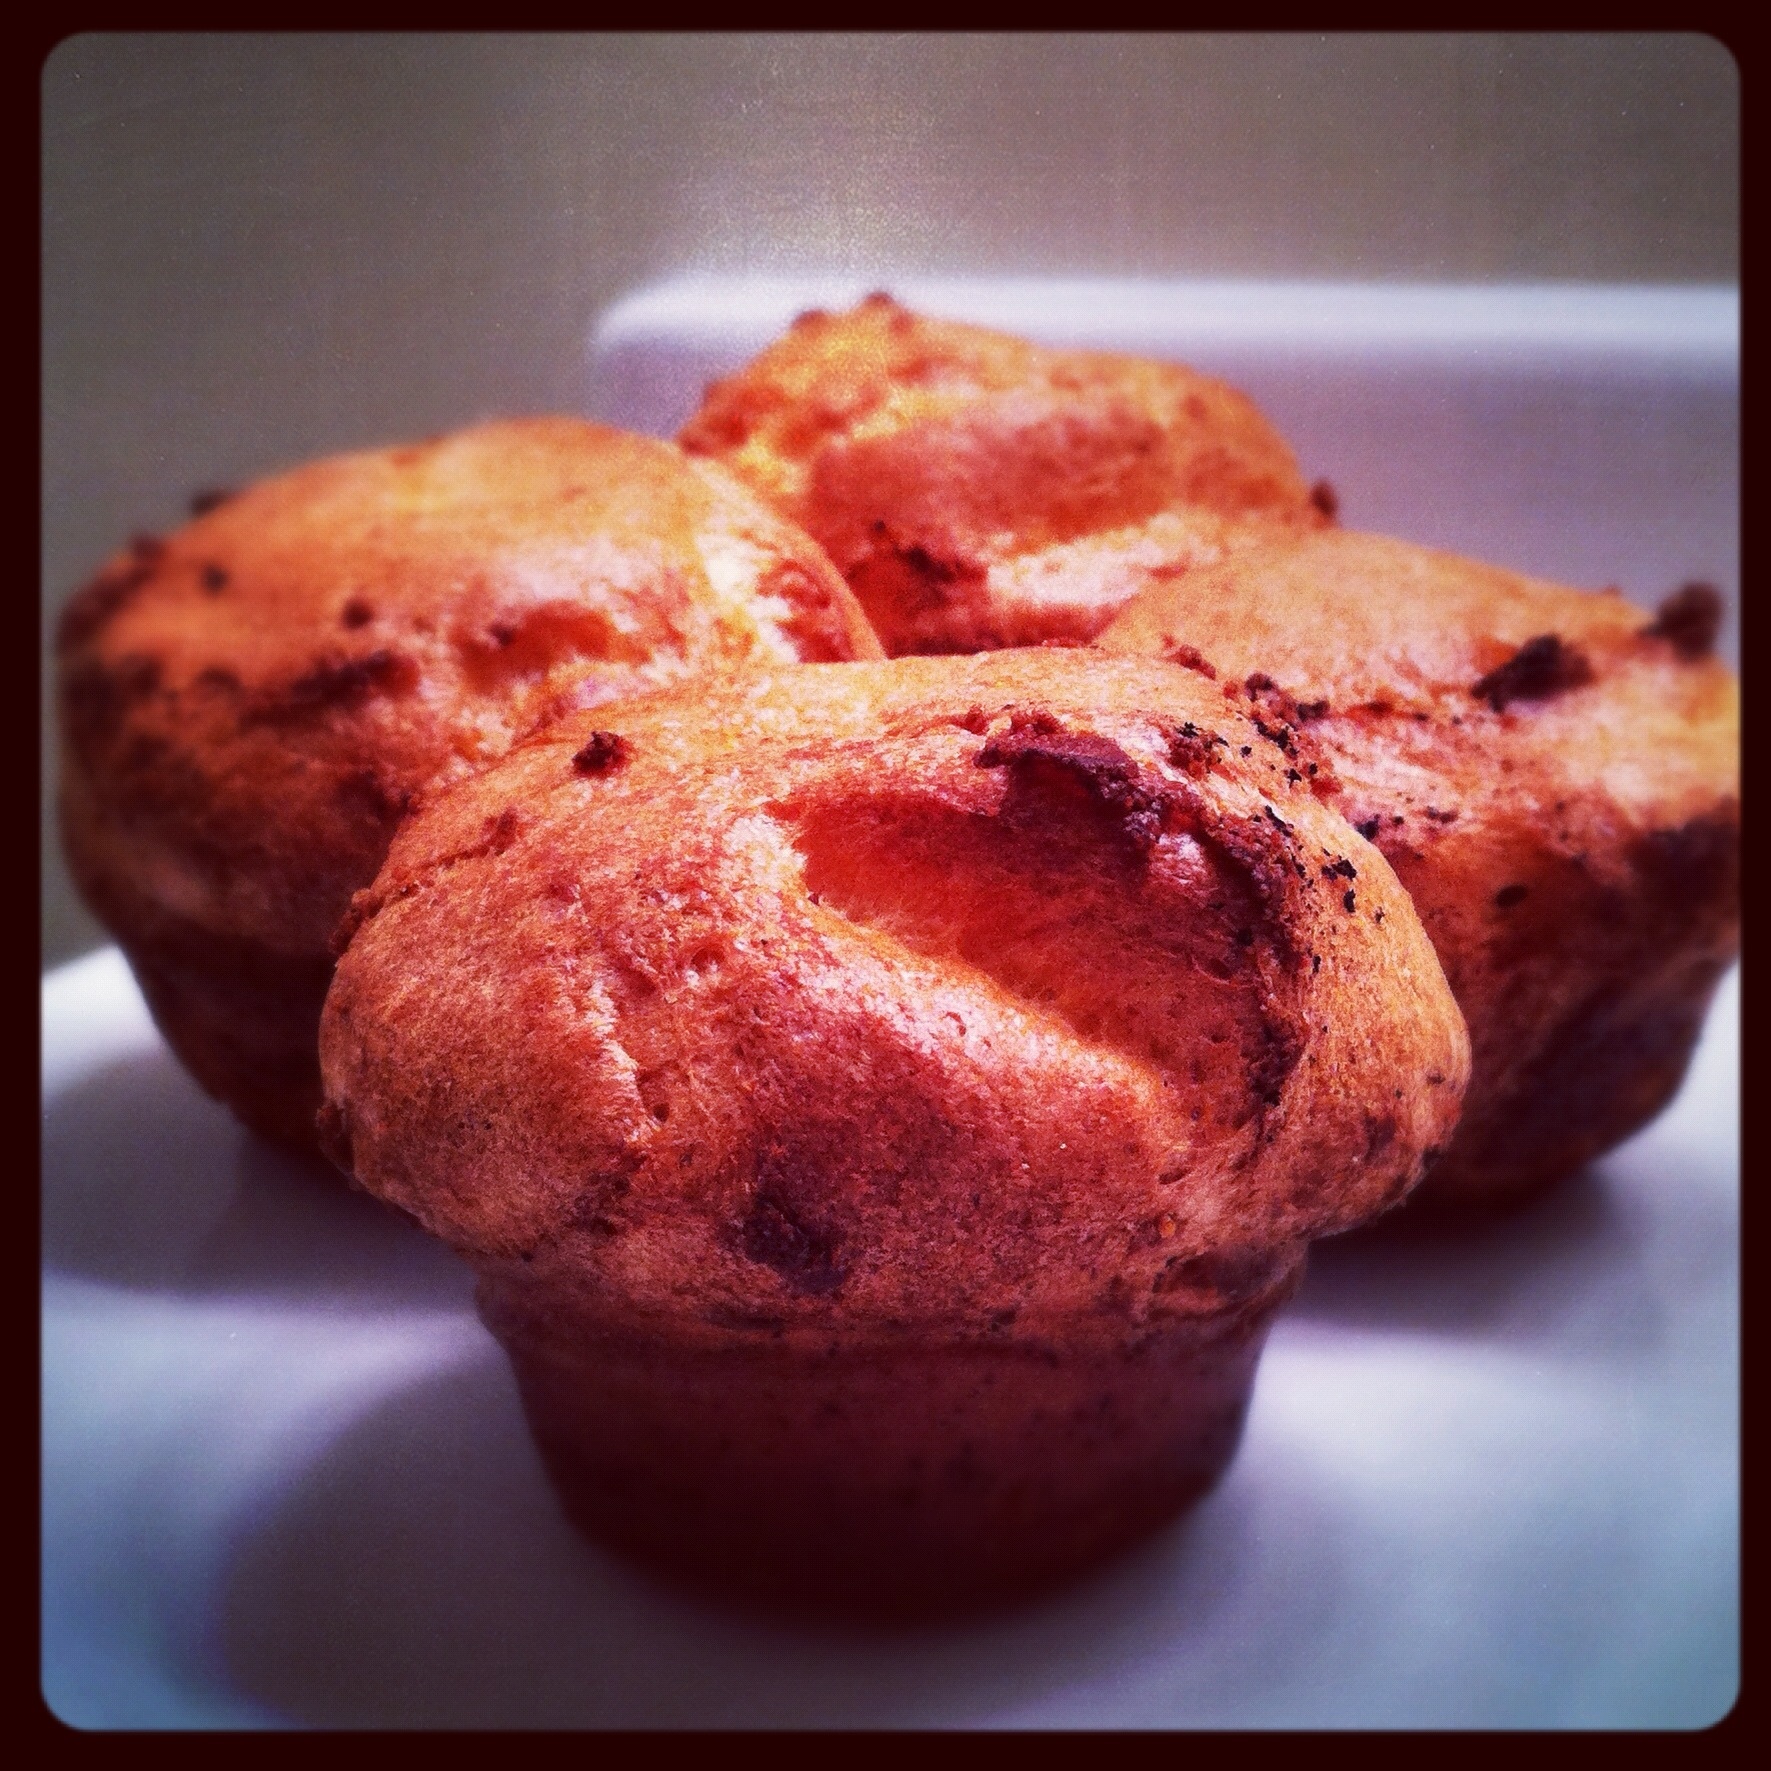
Ok, so maybe I made me these doughnuts. Me and my husband. For breakfast. On a cold sunday morning in Wisconsin. And maybe later that day I heated up some of the extra cider with some bourbon. Just maybe.Have you ever had cider doughnuts? They feel like fall to me. Especially warm, topped with even more cidery delicious goodness. They’re a super easy doughnut. They’re cake doughnuts so there’s no rising and waiting and rising again. Mix up the dough, heat some oil, and boom. Fresh doughnuts. So, so many doughnuts. I saved half the dough for next weekend to make more.
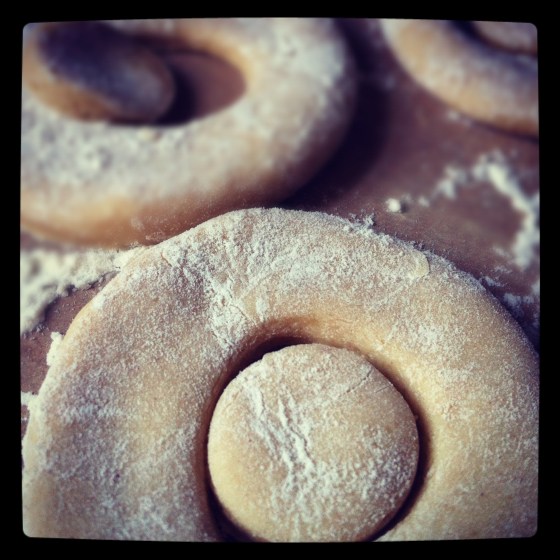
The outsides get crisp and golden, while the insides stay fluffy and light. They cook super quick, and even the rolling out process is simple. These are some seriously good doughnuts.

Go make them this weekend.

Apple Cider Doughnuts

Adapted from this post on the smitten kitchen

Makes 18 about doughnuts + 18 doughnut holes

Ingredients

1 cup apple cider

3 1/2 cups flour, plus additional for the work surface

2 teaspoons baking powder

1 teaspoon baking soda

1/2 teaspoon ground cinnamon

1/2 teaspoon salt

1/8 teaspoon ground nutmeg

4 tablespoons (1/2 stick or 2 ounces) butter, at room temperature

1 cup granulated sugar

2 large eggs

1/2 cup buttermilk


Vegetable oil or shortening

Directions

1. In a saucepan over medium heat gently reduce the apple cider to about 1/4 cup, 20 to 30 minutes. Set aside to cool.

2. In a bowl, combine the flour, baking powder and soda, cinnamon, salt and nutmeg. Set aside.

3. Using an electric mixer on medium speed beat the butter and granulated sugar until the mixture is smooth. Add the eggs, one at a time, and continue to beat until the eggs are completely incorporated. Use a spatula to scrape down the sides of the bowl occasionally. Reduce the speed to low and gradually add the reduced apple cider and the buttermilk, mixing just until combined. Add the flour mixture and continue to mix just until the dough comes together.

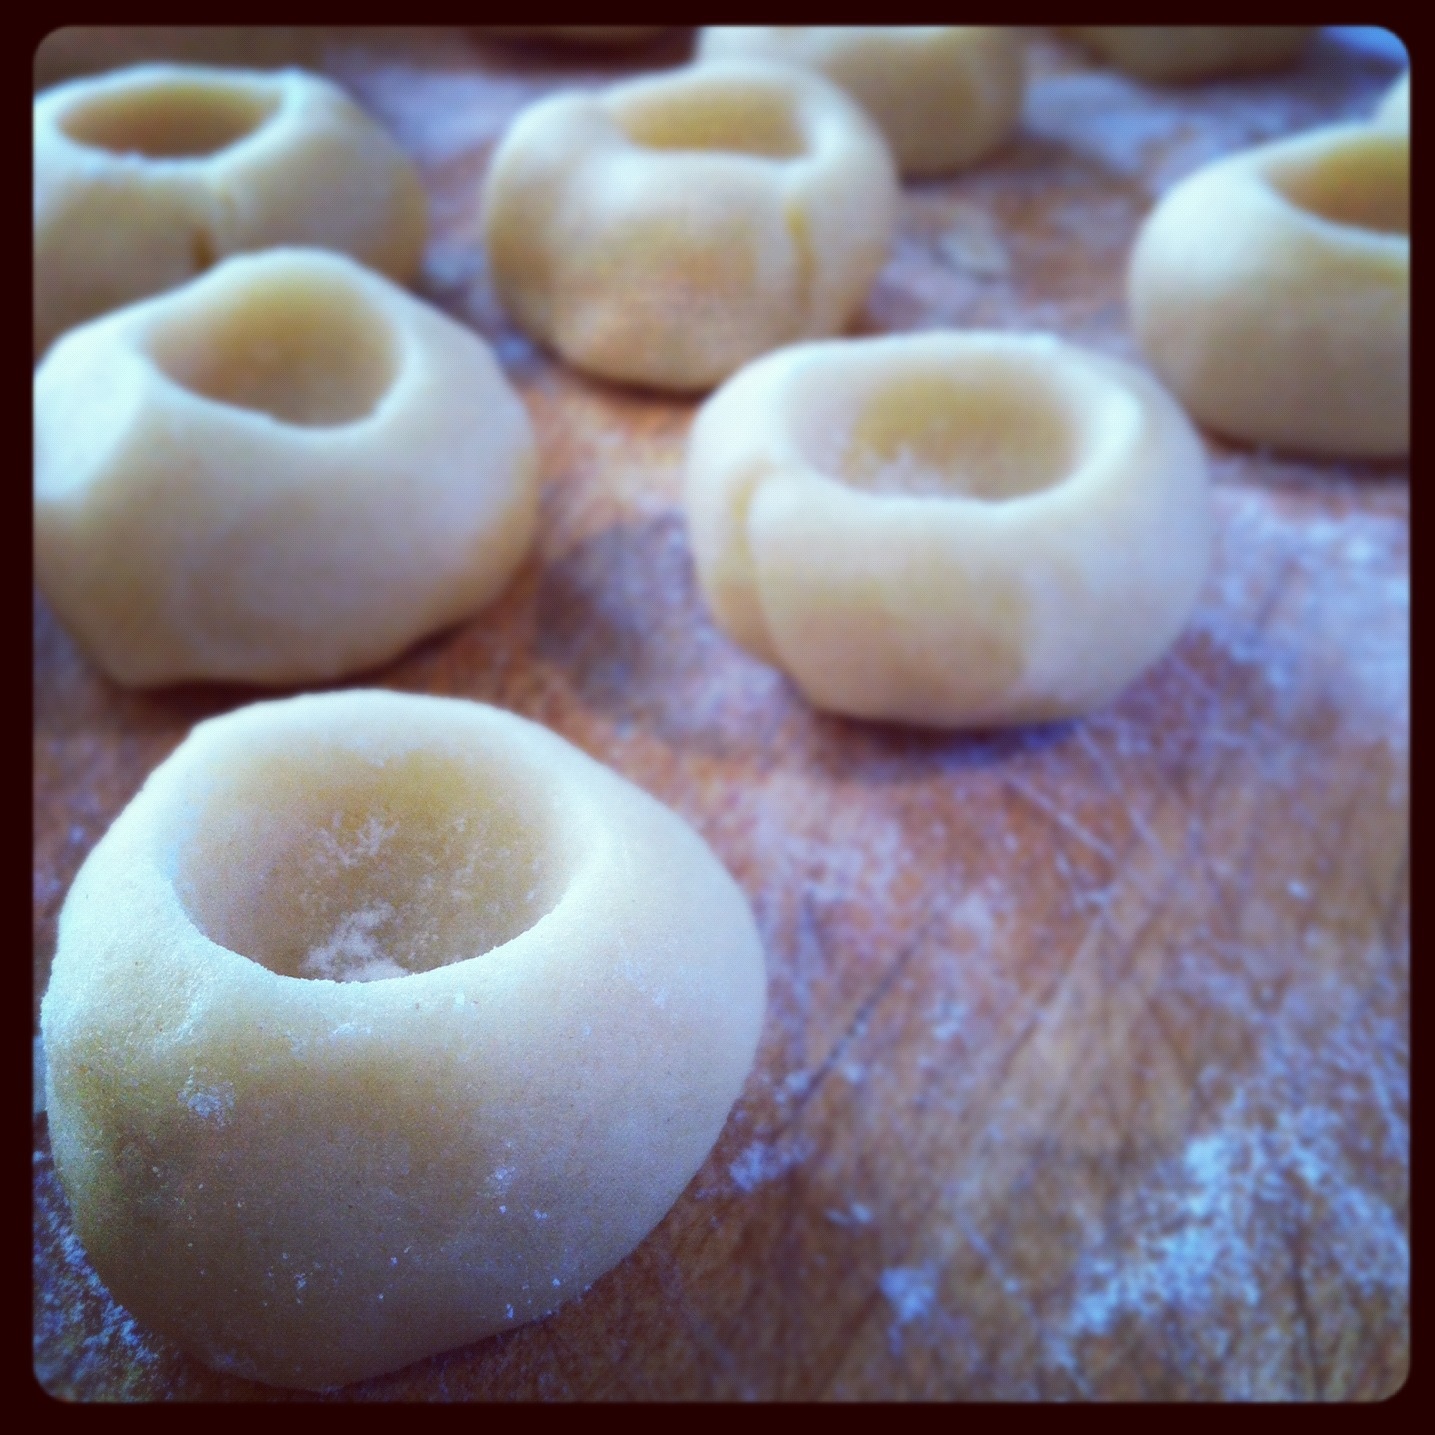
4. Turn out dough onto well-floured surface. Roll out until approximately 1/4 inch thick. Using a 3-inch or 3 1/2-inch doughnut cutter — or a 3 1/2-inch round cutter (or a glass like I did) for the outer shape and a 1-inch round cutter for the hole, cut out doughnut shapes. Place the cut doughnuts and doughnut holes onto the second sheet pan. Re roll scraps of dough. They will not be as tender, but still delicious.

5. Add enough oil or shortening to a deep-sided pan to measure a depth of about 3 inches. Attach a candy thermometer to the side of the pan and heat over medium heat until the oil reaches 350°F*. Here’s a bit of truth for you. I don’t have a candy thermometer. I set the burner to medium and wait until it’s good and hot. Have ready a plate lined with several thicknesses of paper towels.

6. Carefully add a few doughnuts to the oil, being careful not to crowd the pan, and fry until golden brown, about 60 seconds. Turn the doughnuts over and fry until the other side is golden, 30 to 60 seconds. Drain on paper towels for a minute after the doughnuts are fried. Dip the top of the warm doughnuts into the glaze or cinnamon sugar mixture (if using) and serve immediately.

Glaze

Ingredients

1 cup confectioners’ sugar

1 cup apple cider reduced to 1/4 cup + cider as need to loosen glaze

Directions

1. Heat cider over medium heat until reduced to 1/4 cup. Mix until smooth and no lumps remain.

Cinnamon sugar

Ingredients

1 cup granulated sugar

1 1/2 tablespoons cinnamon

Directions

1. Mix until well incorporated.

Chocolate Chip Cookies

So… have you noticed some of my photos look a little different lately?  Well they do.  Here’s the thing, my camera is jacked up.  My lovely dog, accidentally knocked over the tripod, which is almost always set up in my kitchen, and boom.  Down went the camera.  And the lens is now skewed.  So no more sharp focus photos.  Luckily, I have an iPhone.  Which I love.  It is an amazing piece of technology.  Not only did the iPhone camera already almost rival my 10 year old digital SLR, but now, it’s pretty much what I am using to exclusively photograph this blog.  Kind of crazy considering I’m technically, sort of, a photographer.  But way to go Apple for putting a kick ass camera in your phone!!

Anyway, I made some cookies.  From my Ad Hoc cookbook.  They were good, but I have to admit, not my perfect chocolate chip cookie.  These cookie have a higher brown sugar content, and end up a little crisper then I prefer.  I like a super chewy, buttery, bordering on greasy chocolate chip cookie.  Don’t get me wrong, these were good.  If you sandwiched some ice cream between two cookies like he suggests I’m pretty sure it would be undeniably amazing.  Alas I had no ice cream, nor room in the freezer to make any (seriously I need another freezer, like now).  They were however, a worthwhile endeavor on my perfect chocolate chip cookie quest.

Chocolate Chip Cookies

Recipe from Thomas Keller

Makes about 30 three inch cookies

Ingredients

2 1/3 cup plus 1 tablespoon all-purpose flour

3/4 teaspoon baking soda

1 teaspoon kosher salt

5 ounces 55% chocolate, cut into chip sized pieces (about 1 1/4 cups)

5 ounces 70%-72% chocolate, cup into chip sized pieces (about 1 1/4 cups)

1/2 pound (2 sticks) cold unsalted butter, cut into small pieces

1 cup packed dark brown sugar, preferably molasses sugar

3/4 cup granulated sugar

2 large eggs

Directions

1.  Postion the oven racks in the lower and upper thirds of the oven and preheat the oven to 350 degrees.  Line two baking sheets with Silpats or parchment paper.

2.  Sift the flour and baking soda into a medium bowl.  Stir in the salt.  Put the chips in a fine mesh basket strainer and shake to remove any chocolate dust (small fragments).

3.  In the bowl of a stand mixer fitted with the paddle, beat half the butter on medium speed until fairly smooth.  Add both sugars and the remaining butter, and beat until well combined, then beat for another few minutes, until the mixture is light and creamy.  Scrape down the sides of the bowl.  Add the eggs one at a time, beating until the first one is incorporated before adding the next and scraping the bowl as necessary.  Add the dry ingredients and mix on low speed to combine.  Mix in the chocolate.

4.  Remove the bowl from the mixer and fold the dough with a spatula to be sure that the chocolate is evenly incorporated.  The dough, or shaped cookies, can be refrigerated, well wrapped, for up to 5 days or frozen for up to two weeks.  Freeze shaped cookies on the baking sheet until firm, then transfer to freezer containers (Defrost cookies overnight in refrigerator before baking).

5.  Using about 2 level tablespoons per cookies (I used a cookie scoop), shape the dough into balls.  Arrange eight cookies on each pan, leaving about 2 inches between them, because the dough will spread.  Bake for 12 minutes, or until the tops are no longer shiny, switching the position and rotating the pans halfway through baking.  Cool the cookies on the pans on cooling racks for about 2 minutes to firm up a bit, then transfer to the racks to cool completely.  Repeat to bake the remaining cookies.

Roast Squash Pizza

Have you ever put squash on a pizza?  You really should.  It’s pretty much amazing.

I get it, squash on a pizza?  You’re probably thinking I’m a little out there right about now.  Most people wouldn’t think of putting squash on pizza.  But it’s good.  Really, really good.

Pizza is probably one of the most perfect foods.  Dough, sauce, cheese.  It’s wonderful.  Pizza however, is more often then not, pretty unhealthy.  Why?  Why can’t you have a delicious pizza that is loaded with healthy toppings and still tastes amazing?  Really it’s not that difficult.  Even my husband, the guy who only likes plain cheese pizza, liked this.

It starts with fresh dough.  If you haven’t made this pizza dough yet, you need to.  It’s super easy and super delicious.  It takes mere minutes.  Trust me.   The pizza gets topped with a garlic cream sauce.  Super easy, super flavorful.  Finally pile on the toppings.  Be creative, be adventurous, do something you might not normally do.  I put roast squash, fresh spinach, bacon, corn, tomatoes and a bit of grated cheese on mine.  It’s a perfect fall pizza.  Go make one tonight.

Roasted Squash Pizza

Ingredients

3 cups all purpose flour

1 package active dry yeast

2 tablespoons vegetable oil

1 teaspoon salt

1 tablespoon sugar

1 cup warm water

1 small butternut squash

2 tablespoons of olive oil

1 cup fresh spinach

1 ear of corn

1 medium tomato, sliced

2 strips of bacon

1 small yellow onion

1 clove of garlic

1 cup milk

1/2 cup sour cream

1/4 teaspoon of nutmeg

1 tablespoon flour

1/2 cup grated cheese

Salt and pepper to taste

Directions


1.  In a small bowl mix warm water, sugar and yeast.  Set aside for 10 minutes.  Add vegetable oil, salt and flour.  Mix until well combined.  Turn out onto a well-floured surface, roll out to desired pizza size, set aside to rise while you prepare the rest of the ingredients.

2.  Preheat oven to 450 degrees.  Peel and remove seeds from squash.  Chop into approximately 1 inch size cubes.  Toss with 1 tablespoon of olive oil and a dash of salt and pepper.  Arrange in a single layer on a baking sheet and bake for about 30 minutes, until tender and edges are just starting to brown.

3.  While squash is cooking prepare the sauce.  Take the peeled garlic glove and wrap it in tinfoil.  Put in oven with squash and cook until tender, about 20 minutes.  Heat milk and sour cream in a small saucepan, whisking to combine.  Add roasted garlic, whisking to incorporate fully.  Add nutmeg.  Put tablespoon of flour in a small glass and add a few ladles of sauce, whisking to incorporate and add back into sauce.  Add salt and pepper to taste.

4.  In a medium sauté pan heat remaining tablespoon of olive oil.  Add strips of bacon and sautéed until crisp.  Remove from pan.  Chop onion and sauté until translucent.  Husk corn and cut kernels off the cob.  Add to onions.

5.  Assemble pizza.  Spread sauce to edges of crust.  Top with crumbled bacon, sliced tomatoes, onions and corn, spinach and squash.  Sprinkle with grated cheese.  Bake for about 20-25 minutes until cheese is melted and edges of crust are golden brown.